Box-boy Builds A Drawer

I’ve been neglecting my social media for a couple of weeks because I was busy in the shop making my entry for the Worlds-Most-Expensive-Shelf contest. It took me a little over a week to make it—which is fast by my standards, and I installed in the closet yesterday. I didn’t make it expensive on purpose. My pocketbook just suffers because of my cabinetry skills.

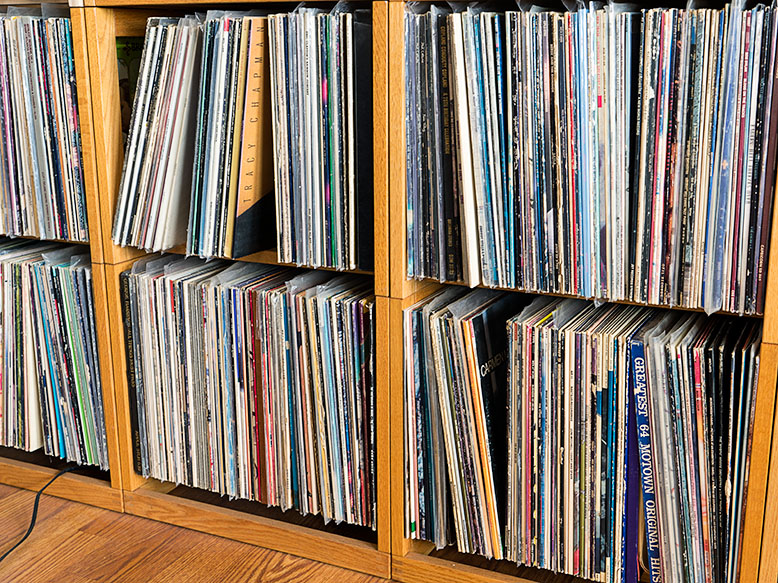
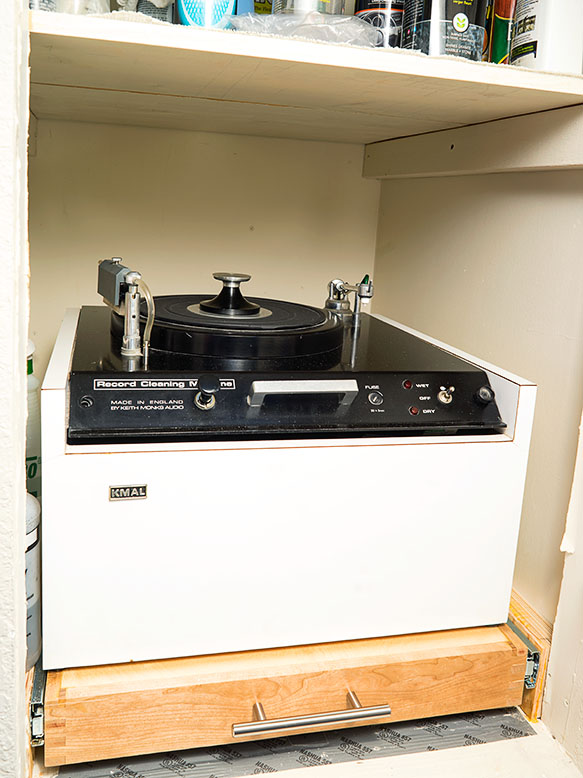
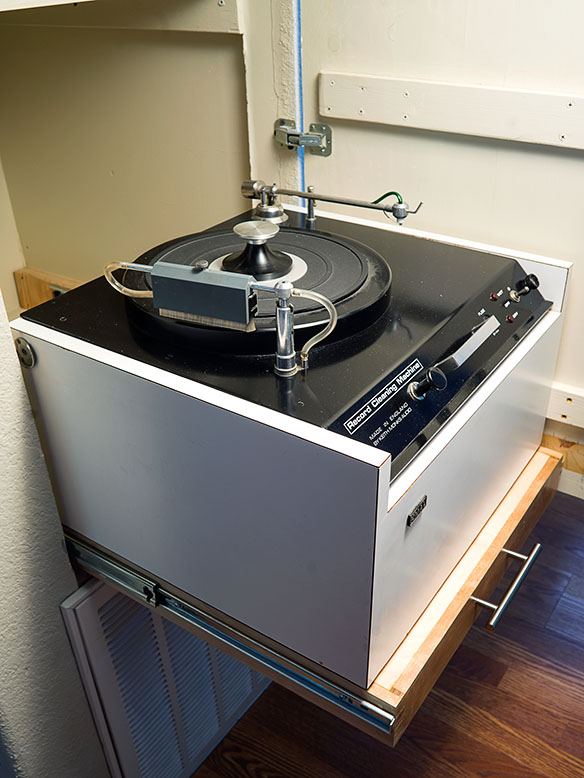
I made the shelf to hold my Keith Monks Record Cleaning Machine. You probably do not know, I’m a fan of vinyl records and I have a substantial collection. Any serious collector knows the advantages of record cleaners and they care for their records by running them through washers. We geeks know that even new records sound better when you wash the mold release from them, and if you depend on the used market for new vinyl, a cleaning machine is essential.

The Library of Congress uses a Keith Monks for their records and I found mine at an estate sale at a fraction of its original price. I’ve had it in three houses now but I’ve never had a proper place for it. Our shack in Congress has an ideal spot. The previous owners replaced the original air conditioner with a version that sits on an outside slab. That left the utility closet next to the stereo empty, so I claimed it before Anne converted it into another junk drawer. The closet is wide enough for the machine to clear with a half-inch to spare, so I set the machine on the bottom shelf while I thought about the shelf design. After two years, I worked down my honey-do list far enough that I made this project a priority.

It’s possible to machine clean a record while it’s in the closet, but it’s hard to see in the dark—especially in the evenings when I do most of my listening, so my design had to have a slide, and a stout one at that. The thing easily weighs 50 lbs. At our Deer Valley house, I cut a piece of ¾ inch plywood which supported the weight, so I knew the general size I needed.

Drawer pushed in.
It’s possible to use the machine while it’s inside the closet, but space is cramped.

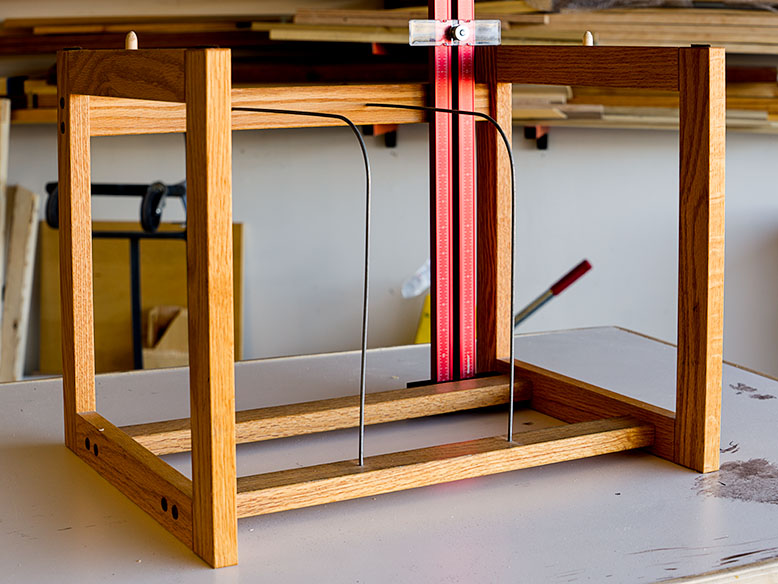
Last week, I set about measuring and drawing up the plans. I had a sheet of Baltic Birch Plywood and a plank of Cherry hardwood I bought for another project that’s still on the to-do list. There were two pairs of 100 lb slides collecting dust on my workbench. With plans in hand, I grabbed the wood and set out to make some sawdust.

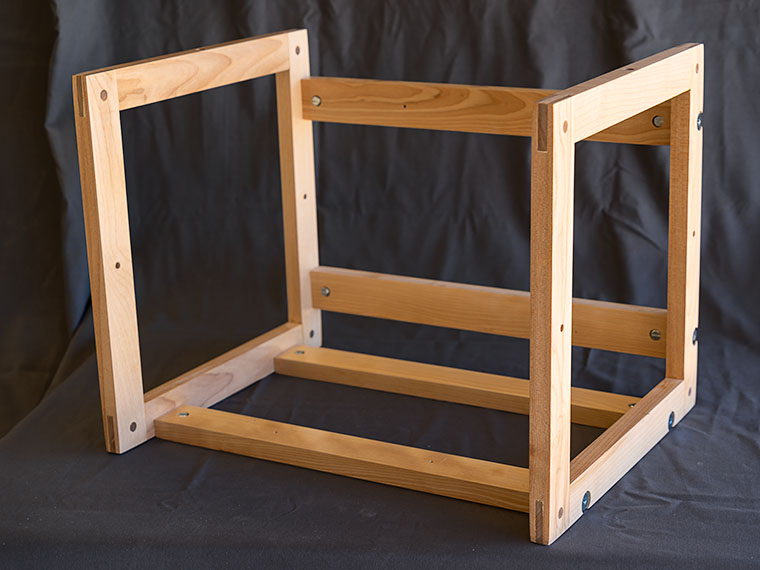
With such a tight fit, I cut the side supports so they would just clear the opening … or so I thought. After mounting the outside rails, they rubbed, so I cut a shim out of scrap quarter-inch plywood to properly space the rails in the opening. After they were in place, I carefully measured the space between them so the drawer would be a perfect fit. I cut the piece of cherry to size and milled box joints on the corners to control the frame size. Then I cut a dado and dropped the plywood into the frame. The width was perfect, but the depth was short. To fix that, I cut another strip of plywood and glued it in place. With that done, my shelf was square and the exact size. All that I needed to complete the project was to sand and finish and sand and finish and sand and finish for the next two days.

Drawer Extended.
At full extension, it’s easy to see and work the machine so that I can get the best results.

On Friday, my shelf was on my assembly table all shiny and pretty and I was proud of how it came out. I carefully measured and installed the rail inserts and took it in the house to slide it in place. It didn’t fit. The rails would insert but they wouldn’t slide in. So I did the most logical thing; I got a bigger hammer. With a lot of pounding it went into place and now it wouldn’t come out. “Maybe the shelf is too wide,” so I sanded the sided with very coarse sandpaper. I gave up after a while and left it till morning.

Starting fresh on Saturday, I shaved each side .05 inches. The slides inserted but they’d stop with a clunk, so I looked closely at them and I saw that during my bout with the big hammer, I had damaged them. They were bent and some ball bearings had come out of their races. Then I saw that the right side was not parallel; when I put the ¼ inch shim in, I misaligned the track so it was binding.

After installing the second pair, the rails worked smoothly, but now the shelf was too narrow from all the trimming. Now I had to take the rails off again and use shims to space them correctly. It was late morning before I slid the shelf in place and worked it in and out. For a millisecond I thought about pulling it apart to finish the sides, but I decided to save that for another year when I get a round-two-it. I’m looking forward to next Friday’s music session when I get to relax while listening to clean records.

Till then … jw

New Video Project – Record Racks Box-Boy Is Lose In The Woodshop

Regular readers of this blog already know that I’ve been trying my hand at making videos. I’ve published ten of them on YouTube so far. All but one of them has been autocross recordings using a GoPro as an in-car camera. The other one was a time-lapse session of the gang raising our carport so that we could park The Ritz under it. That video is the only one so far that’s gotten more than a hundred views because it appeals to a broader audience. (If you’re curious, you can view them here.)

I’ve finally come up with a storyline that I can use to make my first video in earnest. It happens to involve music and woodworking, which are two of my other interests. My video will be ‘how-to’ on making some record racks (yes, Virginia, they still make records).

To give you some background, I a fair-sized record collection. I bought my first album when I was in high school, and I’ve been adding to it ever since. I started storing them in a neat system designed by Per Madsen that he sold as part of his RACKIT system. His bright designs efficiently solved media storage while fitting together to make an attractive media center that put our stacked cinder-block shelves to shame. As I collected more records, I’d just order another rack and add it to the pile.

Per Madsen facks loaded with records.
The Per Madsen style racks store up to a hundred records neatly. Yes, they are in alphabetical order.

Out of the blue one day, I got an email from him saying that he was going to retire. He said that he wasn’t going to make any new units and that all of the existing stock was on closeout. I bought up all that I could use, and then they were gone; that was over a decade ago. In our old home, I bought some IKEA shelves that worked, but those didn’t fit in our new home.

We’ve been in this house for over a year now, and Queen Anne has harped about the two unpacked boxes of records still in the dining room. After staring at my media center one evening, I decided that if I couldn’t add more storage horizontally, I needed to stack them higher and decided to make my version of the Madsen racks. I have enough woodworking equipment to replicate everything but his joints. I believe he used hidden glued dowels, but I can get around that with another type of fitting that’s at least as secure. Another significant advantage of making my own is that I don’t have to use red oak. I can use any hardwood that I want.

There are abundant videos on YouTube featuring artisans far more capable than I. It amazes me how some of these guys (and women) produce intricate wood pieces, sometimes without seemingly measuring. I guess that comes with experience. So, my video will be how a journeyman goes about making multiple pieces of furniture that have to fit together precisely.

Per Madsen's rack design.
The rack design is two healthy rectangular ends connected by rails along the bottom and back.

The first step in this project will be measuring and dissecting Per Madsen’s design and make some working drawings. Then I’ll need to come up with an outline of the steps. Finally, I will lay out a storyboard of the shots before I do any filming. I’m guessing that it will take a month to shoot, but then there’s post-processing, so give me till summer before I post it on YouTube. My goal is to have a video that gets more than a thousand views. I’ll update the blog with progress.

Update 05/13/2020

If you’ve been waiting on YouTube to see this video, it never happened. I’ve decided that although I’m competent behind the camera, I’m a bumbling idiot on stage. But, I have completed some of these record racks, and I’ve had traffic because of this post. Here’s how I made my version.

My Record Rack Version - This is the finished version of my record rack - well except for the wire separators.
My Record Rack Version – This is the finished version of my record rack – well except for the wire separators.

I made some minor changes in my design. First of all, I use mortice and tenons for the mainframes. I believe that Mr. Madsen used dowels to connect his, and I don’t have a precise tool to do that. The large surface area of the tenons provides a strong glue-joint, but I pinned each corner with a walnut plug to be sure.

Second, I added a back rail and spaced them equal to the bottom rails. I was afraid that at my age, I would mix them up, so this way, they are interchangeable. I also changed the way they attach to the mainframe. Instead of two wood screws at each joint, I used cross dowels. That means the rails will rotate if forced, but once the records are in, they work fine.

Finally, I drilled holes in the stiles so I can connect units. The significant advantage of using cabinet connectors is that the stacks don’t get unsightly gaps. Without those, the whole grouping has a professional look.

I used birch instead of oak because I prefer the wood to stay white instead of the nasty yellow that you get with aged oak. Besides, with Danish design, Baltic Birch is a natural choice. If that’s not your style, the racks could be made from walnut, cherry, oak, or something more exotic if you have the money. I have the dimensions on pdf if you’re interested. Just contact me via the contact page.

Today, I’m building a set of CD drawers that fit into this system. I have three of the originals, but I never liked how they looked. I changed my design, so the CDs sit like books on a shelf, but with two rows. That makes it easier to flip through my collection. It works better for me. If anybody’s interested, contact me, and I’ll post photos.

Till then . . . jw