Holbrook Chronicles: A Quirky Journey Through Time and Asphalt Picture of the Month - Holbrook, Arizona

White tee pee-shaped motel rooms with classic car parked outside on Route 66 in Holbrook, Arizona
Nostalgic Nights: The Historic Tee Pee Motel of Route 66 – Step back in time with a glimpse of the historic TeePee Motel on Route 66 in Holbrook, Arizona—where classic cars and unique accommodations summon the spirit of America’s golden age of road travel.

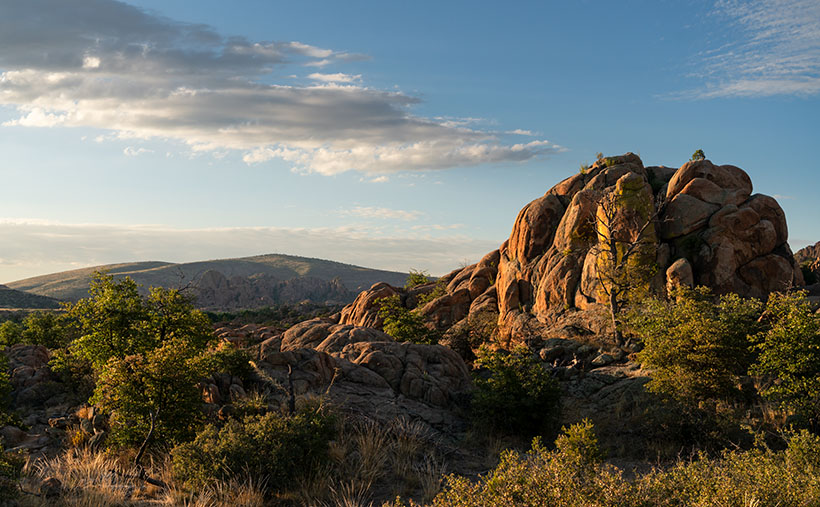
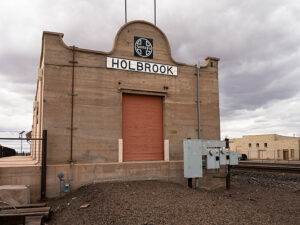
Earlier this year, in a fit of cartographic embarrassment, I noticed my Arizona map was as barren in the northeast corner as my understanding of quantum physics. We use the map to bookmark locations we’ve visited and shared with you. “We must address this travesty,” I declared, or perhaps just thought loudly. Thus, Queen Anne and I embarked on an expedition to Holbrook, a place as famed for its petrified wood as my living room is for lost remote controls.

Upon our grand arrival in Holbrook, it became immediately clear how the town’s history was as layered as my attempt at a seven-layer dip, which never made it past layer three. From the ancient trading routes that seemed slightly busier than my last garage sale to the modern buzz of I-40, which promised the thrill of gas stations and fast food, Holbrook whispered tales of change. And by whispered, I mean it mumbled incoherently, much like Uncle Ray after his third Thanksgiving cocktail.

Wide-angle photo of playful dinosaur sculptures in a rock shop yard in Holbrook, Arizona, with petrified wood for sale
Petrified Pals: The Dinosaur Ambassadors of Holbrook’s Rock Shop – Encounter the past in a playful panorama with Holbrook’s roadside dinosaurs, a nod to the rich paleontological history unearthed at the nearby Petrified Forest National Park.

Diving into the town’s lore, we uncovered tales of early Pueblo peoples, whose idea of commuting was traipsing along the Little Colorado River. They traded goods with the enthusiasm I reserved for exchanging unwanted Christmas gifts. Picture them, settling down by the river’s edge, not to snap sunset selfies, but to swap stories of Coyote, the original trickster who probably invented the concept of “fake news,” and Spider-Woman, the ancient weaver who, unlike me, never blamed her tools for a botched job.

Then came the white men, striding into the horizon with all the subtlety of a brass band in a library. With their grand plans to connect coasts, Lieutenant Whipple and Edward Beale undoubtedly paused to ponder, “Will there be sufficient parking?” Their surveying tales were likely less about the awe of uncharted lands and more about the days when their socks stayed dry.

Early Settlement

In 1876, Mormons fleeing the excitement of Utah found solace in what would become Holbrook, a place that made their former home seem positively Las Vegas-esque in comparison. By then, the town had started to take shape, much like my attempt at sourdough during lockdown—full of hope but ultimately flat.

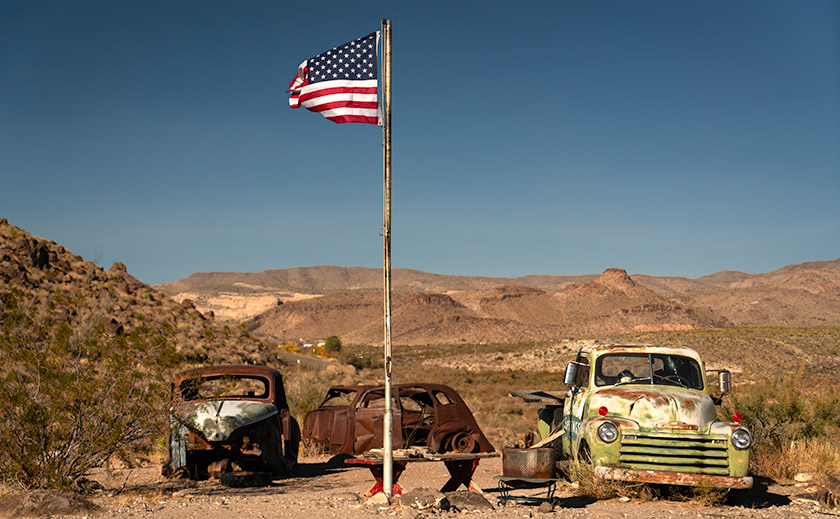
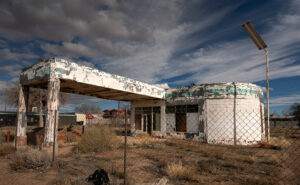
Our foray into this historical mosaic first led us to the part of town that had seen better days. “I’m not getting out of the car,” declared Queen Anne, with the determination of someone guarding the last slice of pizza. And who could blame her? The charm of the Arizona Rancho and the Bucket of Blood Saloon was as evident as the potential in my high school yearbook photo—present, but requiring a generous imagination.

Pedro Montaño built the Arizona Rancho home here between 1881 and 1883. It started as a single-story plastered adobe building with a high-pitched roof and dormer windows. After it was sold to the Higgins family, it became the Higgins House—a boarding house with a two-story addition. Next, it became the Brunswick Hotel. In the 30s, the west wing was used for Holbrook’s hospital, and during World War II, the Navy leased it to house pilots training at the airfield north of town. Now, it’s listed on the National Historic Registry and appears to be undergoing renovation.

Crossing the street from the train depot is another historic building in decay. It was initially called Terrell’s Cottage Saloon, and it was popular with cowboys and ruffians. After a violent gunfight in 1866 that ended up with two men dead, the street was described as if someone had poured a bucket of blood on it. The name stuck, and the saloon and street name bear the moniker. When we visited, a prominent sign urged people to contribute to saving The Bucket of Blood Saloon.

Imagine Holbrook as the Wild West’s version of a reality TV show, complete with outlaw gangs and cattle thieves vying for the title of Most Wanted, starring the Hashknife Gang and the Blevins Brothers, with special guest appearances by the Clantons, who thought the Earps’ version of justice was a tad too personal. Enter Sheriff Commodore Perry Owens, Holbrook’s answer to a sheriff who didn’t just wear a badge but practically invented the law enforcement genre with flair. His Wikipedia page? It’s the binge-worthy history lesson you never knew you needed.

Traffic Increases On Route 66

Faded green signage on an abandoned gas station under dramatic sky in Holbrook, Arizona
Deserted Drive-Up: The Withered Gas Station under Holbrook’s Sky – Behind a chain-link time capsule, the remains of what could be a Sinclair station stand sentinel under the vast skies of Holbrook, a mute testimony to the bustling days of Route 66.

Holbrook thrived on a cattle economy akin to a bovine social club for decades until 1926 rolled around with Route 66, flipping the script. Suddenly, Americans, intoxicated by the freedom of their Model Ts, were gallivanting across the country, pioneering the original road trip minus the luxury of air conditioning or reliable GPS. The Dust Bowl era added a gritty reality show twist, turning Route 66 into the “Mother Road” of all escape routes. By 1938, the road’s complete paving made cross-country jaunts less of a teeth-rattling affair, shifting Holbrook’s social scene north of the tracks. The town’s once-thriving pit stops turned into a ghostly strip of nostalgia, save for the Tee Pee Motel, now a restored relic where vintage cars outnumber guests—missing the chance to sleep in a concrete teepee? Now, that’s a modern regret.

Post Interstate 40

As Holbrook entered the fast lane of the Interstate 40 era, it seems the town, like a bewildered tortoise at a Formula 1 race, was sidelined by the rush towards efficiency. Where once adventurers might pause to marvel at the local color, they now zoom towards the neon glow of franchise signs, seduced by the siren call of combo meals and loyalty points. It’s as if America’s highways have become conveyor belts, whisking travelers from Point A to B with little regard for the stories and spectacles they blur past.

Amidst this homogenized landscape, Holbrook is a defiant reminder that sometimes the best part of the journey is the quirky diner you didn’t expect to love, not the time shaved off your ETA. In rediscovering Holbrook, we find not just a town but a treasure trove of tales begging us to slow down, look around, and maybe, just maybe, find a piece of ourselves among the echoes of Main Street. So, let’s take that exit ramp less traveled; who knows what stories await among the faded signs and whispers of yesteryear?

Old Holbrook train station sign with Santa Fe logo on a building repurposed as a warehouse along the railroad tracks
Tracks to the Past: Warehouse Days at Holbrook’s Old Depot—Standing with silent stories, the repurposed Holbrook train station along the SP tracks endures as a storied warehouse among the town’s architectural relics.

I hope you enjoyed our Holbrook tale and viewing the new photos. If Queen Anne and I have piqued your interest, you can see larger versions of this month’s adventure in my New Work collection <Link> and Fine Art America page <FAA Link>. They’ll be there for the next three months before they make way for a new adventure. Be sure to return next month when we stop at the Painted Desert and Petrified Forest.

Until our next detour, may your travels be full of discovery and stories as rich as Holbrook’s past.
jw

Cool Springs Route 66: Relics and Flags Picture of the Week - Oatman, Arizona

Vintage cars parked under a waving American flag at Cool Springs Station on Route 66, Oatman, Arizona.
Cool Springs Route 66: Relics and Flags – Echoes of the Past: Vintage cars sit silently under the vibrant hues of the American flag at Cool Springs Station, capturing the enduring spirit of Route 66.

The things you do for love. We don’t often get company, but when we do, Queen Anne transforms into a machine as she attempts to disinfect the house from top to bottom. My best chance of staying out of the trash bin or sucked into one of her vacuums is to lock myself in my office. That’s what happened the first week of December. Anne’s sisters came out for a long weekend visit, meaning that she spent the entire month of November scrubbing the walls. She only put down her Comet can for our traditional Thanksgiving dinner at Denny’s.

Before leaving to pick them up from the airport, imagine my surprise when she handed me a crisp $20.00 bill and told me, “Find someplace to spend the night.” It was predictable because we haven’t had enough beds for multiple guests since we sold our Casita (don’t remind me). I decided to drive over to the river and lose my newfound wealth on the Craps table. Since I was going in that direction, I thought I could get some Route 66 shots. And there, my friend is the story of how Oatman became January’s photo project.

In Arizona, there are two long stretches of the original Mother Road. The first and longest is the Seligman – Peach Springs – Kingman section. The other runs from Kingman, through Sitgraves Pass, to Oatman, and then the old bridge crossing the Colorado River. Since I have very few photos of Oatman, I took this route on my way home from Laughlin. I’m glad I did.

The only other time I drove this section of Old Route 66 was during the pandemic. At the time, we were avoiding people, so we didn’t stop to shoot any roadside attractions. However, the Cool Springs Station burned a hole in my lens, so it was a required stop on this trip.

Cool Springs Station and vintage gas pumps along Route 66 with Thimble Mountain in the background in Oatman, Arizona.
Cool Springs: Route 66’s Desert Jewel – Stepping back in time at Cool Springs Station, an iconic stop along Arizona’s stretch of Route 66, nestled against the majestic backdrop of Thimble Mountain.

You’ve likely seen pictures of this place in books or videos about Route 66. With its classic shiny red Mobil gas pumps (there’s a rusty one, too), it’s a perfect backdrop for motorheads to snap a portrait of their car. It hasn’t always been this gleaming jewel on the Mohave Desert floor. It has a history.

Nestled against the rugged backdrop of the Black Mountains, Cool Springs Station has stood as a silent witness to the ebb and flow of Route 66’s storied past. Established in the mid-1920s, Cool Springs was built to serve the burgeoning car culture of America, providing fuel, refreshments, and a welcome respite to weary travelers making their way through the Sitgreaves Pass. Its distinctive stone façade and gleaming gas pumps quickly became a symbol of the optimism and adventure spirit embodied by the Mother Road.

However, the passage of time and the shifting sands of progress were not always kind to Cool Springs. In the late 1960s, as the new interstate system redirected traffic away from Route 66, the station saw a decline, eventually falling into disrepair and was nearly forgotten. It wasn’t until 2001 that Ned Leuchtner, a Route 66 enthusiast, recognized the cultural and historical importance of Cool Springs. He undertook the painstaking task of reconstructing the station, using vintage photos as his guide to ensure authenticity. Today, the station has been restored to its former glory, complete with those classic red Mobil gas pumps and the original stone masonry, standing as a tribute to the enduring legacy of Route 66.

My picture of the month isn’t of the station but the yard art off to the side. The image is a trio of old car shells clustered under an American flag, with the Black Mountains as a background. Although these vehicles are historic, if they had any value, some collectors would have snatched them long ago.

The thing that made me choose this week’s photo is the flapping flag. I shot this midday with lighting that blends the cars and mountains into a bland porridge. The flag becomes the image’s star. It’s almost like the flags that fly over our national cemeteries. The picture says, “These are the fallen heroes of the long Route 66 history.”

We’re tickled that you started this year by spending time with us. If you want to see a larger version of this month’s photo, they are online on my website < Jim’s Page> and Fine Art America <FAA Link>. If you want to buy the Chevy Truck, you can contact Uncle Jim’s Cherry, One Owner, Used Car Emporium by leaving a comment below.

We look forward to your comments, so don’t be bashful. We’ll return with more Oatman and Route 66 photos next week, so don’t touch that dial.

Till then, keep your spirits high and your humor dry.
jw

Techniques: Waiting for the decisive moment.

You might think snapping a flag is a breeze, but let me tell you, it’s more like herding cats on a windy day. I aimed for a balance—not too limp and not overly taut—to convey a sense of movement and life. This required patience and timing, like capturing the peak moment in sports photography. With the wind’s whims as my conductor, I played a game of red and green light, waiting for Mother Nature’s perfect cue—talk about being at the mercy of the elements. In retrospect, a tripod would have saved me from the armache of holding steady through the breezes.

For the technically curious, this was a dance of light and speed. I shot in Aperture Priority mode with an f-stop of 6.1, relying on the bright midday sun to provide a fast enough shutter speed. My main concern was keeping the truck headlights and the flag’s stars and stripes in sharp focus. Choosing the correct f-stop or waiting for the wind is like deciding on the right spice for a stew or the right socks for sandals—not always obvious, but oh-so-important!

The Gilded Road Home: Double Rainbows Over Congress Picture of the Week - Congress, Arizona

Double rainbows arching over State Route 71 with dark golden clouds and the Weaver Mountains in the background, Congress, Arizona.
Double Rainbows Over Congress: An Arizona Road Home – Explore a stunning double rainbow on Arizona’s SR 71. This golden hour capture sets the Weaver Mountains and road to Congress as the perfect backdrop

Welcome back to the final leg of our US 93 in the Golden Hour trip—it’s like a happy hour but with fewer hangovers and more lens flares. Last week, if you recall, we played hopscotch with raindrops beside the road, capturing the Date Creek Range in its full golden glory. After which, I hopped back in the truck, already chalking up the day as a wrap, convinced the photo gods had closed shop for the day.

As I barreled down the highway, I noticed two glorious arcs of color in my windshield. It was like the sky had painted its version of Starry Night but with rainbows. These weren’t your garden-variety, quick-glimpse-or-you’ll-miss-’em types. They were vivid, full-arc, double rainbows. You bet I thought about stopping there—if only the road weren’t hogging the frame. Nature’s light show so entranced me that I almost shot past my exit. Veering onto the ramp like a last-minute shopper on Black Friday, I parked at the bottom, hoping to snag that elusive west leg of the rainbow. No dice.

But then, the universe threw me a bone. As I swung left under the overpass, the eastern leg of the double rainbow was practically touching down on SR 71—my road to El Dorado. I couldn’t resist; the cosmos said, “Welcome home, Jim. Your pot of gold—aka Queen Anne dressed in pearls and pinafore is waiting with a nice pot roast.”

I wanted this shot to scream, “You’re almost home!” as loudly as an Irish setter wagging its tail at the front door. Standing in the middle of the asphalt, eyeballing the lens and framing that quintessential road view, felt right. The receding road signs served as breadcrumbs leading us to the mountain’s base—the ultimate exit sign to our slice of paradise. And hey, that mileage sign? Seven miles to home, folks. The rainbow, of course, gets top billing, occupying most of the frame because, let’s face it, it’s the Beyoncé of this visual concert.

Did you know you can never drive through a rainbow? Yep, don’t even bother revving that engine. That’s because rainbows aren’t physical entities; they’re celestial eye candy, illusions caused by sunlight’s refraction, dispersion, and reflection in raindrops. If you hadn’t fallen asleep in your high school physics class, you’d know these things. When sunlight enters a raindrop, it slows down and bends as it goes from air to water. Inside the raindrop, the light disperses into its various color components. It may reflect off other raindrops as it exits the raindrop, creating this stunning arc. The magic number here is a 42-degree angle of refraction. No, it’s not the secret of life, the universe, and everything—though it’s close—but rather the angle at which light is refracted to form that vibrant arc in the sky.”

And just when you thought one rainbow was enough to make you pull over and risk getting your shoes muddy, nature decides to double down. That’s right—a double rainbow, all the way! But wait, there’s a twist. If you look closely, you’ll notice the colors in the second, fainter rainbow are flipped. While the primary arc screams ‘ROYGBIV,’ its more introverted twin whispers’ VIBGYOR.’ What’s the deal with that, you ask? The second rainbow undergoes a second reflection inside the water droplets, effectively flipping the color scheme. It’s like nature’s version of a plot twist in a thriller movie. You never saw it coming, but it makes the story better.

You might be scratching your head, wondering why you don’t always get a two-for-one deal with rainbows. The answer, my friends, lies in the perfect concoction of light intensity, droplet size, and good ol’ atmospheric conditions. The second rainbow is like the shy sibling at a family gathering—too bashful to crash the party without an engraved invitation from the universe. It needs more specific conditions to come out and play, like bigger raindrops and darker skies to contrast its fainter colors. So, the next time you spot a lone rainbow, know its elusive twin wasn’t feeling the party vibe.

Hey there, rainbow chasers and golden hour aficionados! I hope you’ve enjoyed this magical journey down Arizona’s highways as much as I have. If this picture has left you starry-eyed and longing for more, don’t forget that you can see bigger versions of this photo in my New Work collection (Jim’s Web) or its page at Fine Art America (FAA Page).

While we’re wrapping up this month’s project, rest assured that another adventure is on the horizon. So make sure you swing back around next week for a new slice of life, served up Jim Witkowski style. Now it’s your turn. Have you ever encountered a vibrant double rainbow that made you forget about your exit? Or maybe you have a rainbow story that can top mine? Either way, spill the tea—or, in this case, the rainbow—in the comments below!

Till next time
jw

Techniques: The Wide-Angle Wonder—Capturing Expansive Landscapes

Do you know how the perfect landscape shot often feels like trying to fit a square peg into a round hole? There’s just too much beauty to squeeze into that tiny frame. Enter wide-angle lenses—the landscape photographer’s magic wand for making square pegs fit just right.

Let’s start by cracking the code on focal lengths. A wide-angle lens typically has a focal length of 35mm or less. And this little number can pack in a lot of sky, earth, and anything in between. That’s why it was my go-to for capturing this double rainbow phenomenon. It allowed me to give the rainbow—and its quieter, introverted sibling—the room they needed to shine.

Wide-angle lenses aren’t just for fitting more stuff into your shot; they’re great for storytelling, too. In our Double Rainbows Over Congress, the wide-angle lens allowed me to include the expansive sky, the road signs gradually shrinking into the distance, and the mountains’ embrace, all without cramping the style of the rainbows that are undoubtedly the stars of the show.

But it’s not all rainbows and unicorns. Wide-angle lenses can distort straight lines, making them curve towards the edges of the frame. Sometimes, you can turn this into a creative advantage, like making the road seem even more stretched, like reaching for the mountains. Other times, you might want to tweak things back to normal in post-processing, using lens correction features.

A word to the wise: wide angles can make close objects appear more prominent, and distant objects look farther away. But don’t be fooled—this lens isn’t an all-you-can-eat buffet for your frame. The trick isn’t to turn your photo into a yard sale of visual elements; it’s about emphasizing what matters. Do it right, and your image becomes a gourmet burger with just the right toppings. Do it wrong, and you’ve got yourself a Dagwood sandwich—so stuffed you don’t know where to take the first bite. That’s where your artistic judgment comes into play. How much space do you want to give each element so they all get their moment in the sun, in this case, between the rain showers?

And there you have it—a quick but jam-packed dive into the wonders of wide-angle lenses for landscape photography. I hope you find it as liberating as I do when you’re chasing your next perfect shot.

The Dells’ Drama: Light, Shadow, and Stone Picture of the Week - Prescott, Arizona

A sunlit canyon at Granite Dells with angular rock formations, highlighted by shadows and a blue sky backdrop.
The Dells’ Drama: Light, Shadow, and Stone – On the Constellation Trail at Granite Dells, angular lines of sunlit rock formations converge, telling tales of erosion and time. Amidst the rugged terrain, trees rise, contrasting against the textured granite, all under a vast blue Arizona sky.

Thanks for joining us on the Constellation Trail in the Granite Dells this morning. Of all the paths I’ve dared to tread, the Constellation Trail welcomes both the adventurous explorer and those of us who occasionally confuse a hiking boot with something you’d wear to a dinner party. Located off Arizona Route 89, it’s a sizeable, well-marked loop with several cross trails that make it easy to tailor your hike to your abilities. As you know, I’m not too fond of physical exercise, but I know that my best photos come from getting out of my truck, and once I’m out in nature, my senses become heightened. Last week’s photo showed an example of the views you can see along the trail’s high points, while this week, we explored the shadows on canyon walls where the trail cuts through the Dells’ ravines.

In the heart of the Granite Dells, life thrives against all odds. Amidst ancient boulders that are silent witnesses to millennia gone by, scrub oak and sumac tell a tale of nature’s indomitable spirit. They’ve evolved to survive and flourish, sipping sustenance from the unforgiving granite, striking poses of raw, untamed beauty against a backdrop that laughs in the face of gentleness. As the morning sun casts the canyon in a gentle glow, their silhouettes emerge sharper, paying tribute to nature’s ability to find pockets of life even in the most challenging environments.

Interestingly, the Granite Dells aren’t just a feast for the eyes but a geologic wonder. Estimated to be around 1.4 billion years old, these ancient formations are composed of a type of rock known as Precambrian granite. What you see on the surface only scratches the surface of their actual complexity. These stones have witnessed countless eras, weathered innumerable storms, and survived the ever-changing dance of geological forces. As a photographer, capturing these ageless guardians feels like stepping into a time machine, where every click of the shutter connects you with a history that transcends human comprehension. While the vibrant hues and shadows make for stunning imagery, the timeless wisdom in these stones adds an ineffable quality to the photographs. That’s the unseen charm of the Granite Dells, a joy that plays hide-and-seek with your senses and challenges you to see beyond the obvious.

The path lured me to a breathtaking cataract surrounded by boulders that must have been hand-placed by giants. Navigating through the canyon was as easy as following a breadcrumb trail—if the breadcrumbs were the size of small cars and strewn by a mythical creature with a flair for drama. Surprisingly, navigating through the canyon wasn’t challenging, thanks to the downward trail. I found the perfect vantage point on a ledge after clearing the gorge. From there, the sunlight playing on the rocks created an arresting visual that resembled a mighty fist. I had toyed with the title “Pow” but felt The Dells’ Drama: Light, Shadow, and Stone captured the essence far better.

I have posted two larger versions of this image for your enjoyment. The first is on my Website, of course, and you can see it by following this link (Jim’s Weblink); the other option is the page I made on my Fine Art America page, and the easiest way for you to get there is via this link (FAA link). Each click will transport you deeper into the heart of the Dells’ magic. Queen Anne and I want to thank you for stopping by this week. If we’ve piqued your interest, tune in next Sunday. We’ll uncover more mysteries of the trail, provided I don’t get lost or distracted by something shiny.

Till next time
jw

Technique: Saturation as a Photographer’s Opioid

In photography, playing with saturation is like walking a tightrope – thrilling, daring, and slightly less likely to end in a dramatic tumble. When applied with precision, it can elevate an image, adding depth and vibrancy. Yet, the temptation to overindulge can be difficult. Excessive saturation risks rendering photographs unnatural, pushing them into the realm of ‘Disney-chrome’—a world where colors are too intense to be accurate. This impacts the aesthetic appeal and can be problematic when printing. Over-saturated photos, significantly beyond a medium’s color gamut, lose their subtle gradations, often resulting in blotchy areas that mar the final product, like a print or book.

Hue and Saturation Pallet with this Photoshop tool, you can add saturation to a photo until it had day-glow colors, or you can remove the color to make the image pastel or even black and white.
Hue and Saturation Pallet With this Photoshop tool, you can add saturation to a photo until it has day-glow colors, or you can remove the color to make the image pastel or even black and white.

For the photography enthusiasts, here’s a peek behind the curtain: When tweaking the saturation in this week’s photograph, I worked with values that might seem conservative to some. The overall saturation was subtly lifted to a value of +5, while the green hues were enhanced a second time using a slider value of +10. These numbers aren’t pulled out of a magician’s hat but result from countless trials, errors, and what some might call an unhealthy obsession with color balance. Like a chef’s secret recipe, these values are part of what makes the image uniquely mine. Feel free to experiment with your concoctions, but remember: With great power (or slider control) comes great responsibility.


Awakening of the Granite Giants Picture of the Week

Golden morning light illuminating the rugged landscape of Granite Dells, with Glassford Summit in the background.
Awakening of the Granite Giants – A mesmerizing view of the Granite Dells under the soft glow of the morning sun, casting a beautiful light on the weather-worn rocks with Glassford Summit standing majestically in the distance.

My calendar page flipped to August this week, and that means that summer’s half over. In standard years, we would have been inundated with monsoon rains and antsy for the wet season to end. But, in this most unusual year, we’re waiting for the rains to start. We often see afternoon clouds here in Congress, Arizona, but they’ve only been a tease. The new month also means a new photo project, and I decided to stay in the high country—if you consider Prescott the highlands. We will wander the trails in the Granite Dells to capture its natural beauty and fill in my Website portfolio. The exposed cracked and worn boulders are common throughout Arizona, but this patch is the only city park.

The Granite Dells of Prescott, Arizona, is a geological wonder with around 1.4 billion years of history. Their formation began deep beneath the Earth’s surface, where molten magma slowly cooled and crystallized into hard, dense granite. Over hundreds of millions of years, erosion wore away the rock layers above, revealing the granite bedrock. Once exposed to the atmosphere, the granite underwent spheroidal weathering, a process that smoothed its corners and edges into the distinctive, boulder-like shapes we see today. This weathering, coupled with millions of years of further erosion, has sculpted the Granite Dells into their current, stunning form, with the boulders providing unique habitats for diverse flora and fauna.

Close-up study of Common Mullein stalks, brightly lit against a darker, out-of-focus background.
Majesty in the Ordinary – An intimate view of Common Mullein stalks bathed in the golden morning light, their unexpected elegance highlighted against the darker foliage of the Granite Dells.

We will start this month’s photo tour of the Dells with a long shot I took at dawn while hiking the Constellation Trail. At that hour of the morning, I thought I’d have the place to myself, but the parking lot was half full when I arrived, and true to form, I was in everybody’s way as I trudged along with my camera. I was in the middle of the loop when the sun emerged above the cloud layer along the horizon, casting a golden light on the rock formation before me. I can’t begin to tell you how delighted I was to see how it showed off the rounded shape and texture of the granite boulders. The Dells have a sense of anchor in their surroundings with the radio-tower-topped Glassford Summit. I call this week’s image Awakening of the Granite Giants.

We’re so glad that you joined us on the trail this morning. Throughout the rest of the month, we’ll share more images taken on tracks running through Prescott’s most significant city park. And you can count on us to dig up more interesting trivia about the Granite Dells. If you’d like to examine larger versions of Awakening of the Granite Giants, you can visit its page on my Website by following this link (Jim’s Website). You can also pixel peep on my Fine Art America posting by following this link (FAA Post). Be sure to return next week when we present another image of the intriguing Granite Dells.

Till next time
jw

Techniques: Restoring Dark Areas In Back Lit Images

In last week’s session, I showed how I manage shots to prevent blowing out the highlights when shooting in lighting conditions too broad for the camera’s sensor to capture—like the dawn, dusk, or back-lit situations. We concluded that discussion by predicting that the darker areas would be too dark to be pleasing. In this post, I will explain how I balance the exposure in Photoshop so the image looks natural.

Quick Selection Tool - I use this tool in the Tool Palate to select the areas that I want to work. It's the fastest and most accurate selection tool in Photoshop.
Quick Selection Tool – I use this tool in the Tool Palette to select the areas I want to work on. It’s the fastest and most accurate selection tool in Photoshop.

Artificial Intelligence (AI) has recently been in the news, with stories ranging from how it helps doctors find cancer in patients earlier to how it will eventually eat our brains—like Zombies. Well, Adobe has an AI-driven tool in Photoshop that enables you to select complex areas of your images. It’s called the Quick Select Tool. It seems to be mainly used to cut models—and their fly-away hair—from one background so they can be pasted into another. I use it to select the dark areas in my landscapes that need lightening. My process involves three steps: Selecting, Refining, and Correcting.

Refine Selection Workspace - With this tool, you can nudge and perfect which areas you want to be active within your adjustment layer.
Masking Workspace – With this tool, you can nudge and perfect which areas you want to be active within your adjustment layer.

After doing my color corrections and setting my Black and White points in my workflow, I try to balance my image’s exposure. Using the Quick Select (QS) Tool, I roughly select the area I want to work with, and that’s usually everything below the horizon. At this point, I’m not trying to be precise. After I drag the QS brush over the area I want to modify, I click on the Select and Mask button at the top of the workspace, which opens a Masking Workspace showing the selected areas of the image. I use a red mask set to 40% opacity to see which areas of the image will be affected by the following steps. Within the right panel, there’s a bunch of number settings that I’ve fiddled with over the years before settling on these: Radius=0, Smooth=2, Feather=2.5px, Contrast=25%, and Shift Edge=-2% (be sure to check the tiny little box tabled ‘Remember Settings‘ otherwise you’ll constantly have to reset these values). Using these values, I choose the Brush Edge Tool—the second from the top in the brush palate—and run it along the edge of the selected areas. What the AI does for me is pick out all of the little trees and other objects (like the leaves in the second photo this week) and separate them from the sky—an otherwise impossible task. Once I’m happy with the selection, I click ‘OK,’ the screen returns to the original workspace with the selected area now outlined with ‘dancing ants’—a term used to describe the animated dotted line showing the selection.

The next step is to correct for the darkness, and to do that, I choose a new Exposure layer from the list, which opens with the new mask in place. In the new layer, I use the slider to adjust the area to the lightness that looks good to me—usually between ¼ to a complete stop (.25-1.0), but with the sensor on my Sony camera, I’ve been able to lighten the dark areas by 2½ stops without causing a loss of detail in shadows or other unwanted digital artifacts (such as pixelation or banding).

Remember, by working with layers, you can go back and change your adjustments later. Also, remember to save your work frequently, especially after making significant adjustments.

Mount Ord’s Pine-Covered Heights Picture of the Week - Rye, Arizona

Mount Ord from the west side, showing its majestic peaks and pine-covered heights.
Mount Ord’s Pine-Covered Heights – Behold the awe-inspiring Mount Ord as it stands tall, adorned with lush pine-covered peaks. The afternoon sun casts its warm glow, revealing the rugged beauty of this majestic mountain.

Welcome back to the final episode of our Mazatzal Mountains tour. This week, our magic bus has made it over the last mountain pass, and we’ve stopped in Rye, the quaint community nestled at the bottom of the final grade leading to Payson. Here, the Beeline Highway exits the Mazatzals, bidding farewell to the majestic mountains that have enchanted us throughout our journey.

This week’s featured photograph, Mount Ord’s Pine-Covered Heights, captures the awe-inspiring grandeur of this majestic peak. Standing tall at 7,128 feet, its proud summit is crowned by a lush and verdant pine forest, gazing serenely at the world below. Mount Ord’s presence commands the landscape like a sentinel guarding the horizon. While it may not claim the title of the tallest peak in the Mazatzal Range (that honor goes to the 7,903-foot Mazatzal Mountain hidden behind the camera), being the highest point in Gila County is no small feat—perhaps deserving a participation trophy for its natural splendor.

Near the mountain top, the dark green foliage is an honest-to-goodness pine forest. It’s a sight to behold, and, unfortunately, a locked gate restricts access to this cool, refreshing forest on the unpaved service road leading to the summit. However, the image allows us to appreciate the beauty of this hidden gem from a distance.

Another fascinating feature in the photograph is a rugged and dramatic limestone layer emerging from the Earth’s embrace, seemingly carved by the hands of ancient giants. These yellowish rocks bear the story of a primordial ocean, etched into their very essence through eons of geological transformations. This layer of limestone formed millions of years ago in the sea and was later thrust into its current location during the continental crash that shaped the Rocky Mountains. This geological history makes the Mazatzals a part of the fender dent of that ancient collision.

Close-up of an exposed limestone ridge, showcasing its jagged and fractured formations.
Jagged Elegance: The Thrust of Limestone – Intricate and sharp, the exposed limestone ridge reflects the Earth’s geologic history. Bathed in the warm glow of the backlit sun, this natural sculpture reveals the forces of nature at work.

The second image we’ve posted this week is a closer look at the limestone layer on the west side of the highway. One particular jagged piece looks like a shard of glass ready to be used in a bar fight. I’ve also captured a beautiful Claret Cactus in full bloom for those seeking variety beyond the rocks.

Close-up of a claret cactus with its vibrant, sunlit flowers in full bloom.
A Burst of Color: Vivid Claret Cactus Flowers – Midst the desert landscape, the claret cactus graces us with its vivid flowers, glowing like radiant gems in the sunlight.

We hope you’ve enjoyed our magic bus excursion through the Mazatzals and that you’ll appreciate the beauty of these mountains, even more the next time you drive up to Payson. As always, I invite you to view larger versions of “Mount Ord’s Pine-Covered Heights” on my website by following this link [Jim’s Website] or on Fine Art America using this link [FAA Page].

Next week, prepare to venture off the beaten path as we leave the comfort of our magic bus behind. In embracing cooler climes and untouched wilderness, we’ll embark on an invigorating hiking adventure to uncover the hidden gems of nature’s gallery.

Till next time,
jw

Techniques: Mastering Back Lighting

In photography, an outdated rule advises shooting your subject with the light behind and to the side of the camera. While this approach works well in about 80% of cases, there’s still the other 20%—those tricky backlit situations. Today, I’ll share how I tackle such challenging conditions during the shoot, and next week, we’ll delve into post-processing in PhotoShop to perfect these images.

A common concern in modern digital photography is preserving the highlighted details in a scene. Overexposing the highlights can lead to blown-out areas and loss of detail and information. Fortunately, many cameras, including mine, have a helpful tool to address this—the zebra stripes.

Zebra Stripes - The stripes are an exposure tool that warn you when the light is too bright for the camera sensor to capture.
Zebra Stripes – These are an exposure tool that warns you when the light is too bright for the camera sensor to capture.

Zebra stripes are diagonal lines that appear in your viewfinder, indicating areas where the light is too bright to be captured by the sensor. You can control when and where these stripes appear by setting the zebra threshold in your camera’s menu. For my workflow, I put the value to 100% to ensure a clear indication of potential overexposure.

Zebra stripes might appear in the sky or other bright areas when shooting in backlit conditions or during early morning or sunset. To tackle this, I slowly point my camera toward the bright area the stripes indicate until they disappear. This process helps me find the minimum exposure adjustment needed to avoid blowing out the highlights. Once the lines vanish, I half-press the shutter button to lock in the focus and exposure.

While holding the shutter button half-pressed, I recomposed the scene to my desired composition before fully pressing the shutter to take the shot. Finding the right half-press point takes practice, but with digital photography, you can afford to experiment and learn from your results.

Remember that when you review your shots taken using this method, the sky, and clouds might look perfect, but the ground could appear too dark with limited details. Don’t worry; next week, we’ll explore post-processing techniques in PhotoShop to enhance these images and achieve the perfect balance.

Until then, practice your zebra dance and keep saving those highlights!

Saddle Mountain Silhouette: The View from Rincon Pass Picture of the Week - Sunflower Arizona

Majestic view of Mazatzal Range with Saddle Mountain silhouette at Rincon Pass.
Saddle Mountain Silhouette: A View from Rincon Pass – A picturesque landscape of the Mazatzal Range unfolds, revealing a symphony of layers and the iconic silhouette of Saddle Mountain at Rincon Pass.

Welcome back to the fourth installment of our Mazatzal Mountain tour via the Beeline Highway. With the current heat wave, our bus feels more like a scene from Romancing the Stone, filled with hot and sweaty people trying to stay cool with all the windows down. It’s so scorching outside that even chickens tied to the grill seek shade.

Of course, leave it to Queen Anne to pick the hottest week for our trip to the dentist in Algodones, Mexico. We left our comfortable haven in the Weaver Mountain foothills, where the air conditioner doesn’t run all night, only to be greeted by 115°F heat in Yuma, the lowest point in Arizona. Queen Anne’s flip-flops even melted away, forcing us to make an emergency shoe stop at a Zapata store. The trip’s highlight was the customs house with no waiting lines—small blessings in the sweltering inferno.

But enough of the heat woes; let’s escape to cooler grounds. This week’s destination is just a few miles north of our last stop, but we’ve left the Sonoran Desert behind. The newer section of the highway bypasses the shady beauty of Sycamore Creek, where there was always a respite from the sun. The creek lies on private property, and I imagine the owners are delighted to be rid of the traffic.

I pulled over near Iron Dike, a black rock mound, to capture this week’s featured image, Saddle Mountain Silhouette. In this shot, we gaze beyond the hilltop and the intricate jumble of mountains and canyons to Saddle Mountain—a fitting name for its distinct profile. Standing at 6529′, it doesn’t make the top ten of the Mazatzal’s tallest peaks, but its imposing presence seems to watch over the surrounding lesser hills.

Sycamore Creek flowing amidst lush greenery and tranquil waters.
Tranquil Waters: Sycamore Creek’s Verdant Beauty – Embrace the serenity of Sycamore Creek, where the gentle flow of water and vibrant greenery create a symphony of tranquility.

After capturing this shot, we took a refreshing detour down the old road, seeking relief from the heat under the cool canopy of sycamore leaves. Though the creek’s flow was modest, it still managed to cool the air, acting like nature’s swamp cooler.

We’re thrilled you’re along for the ride this week, and we hope to have you back next Sunday for the conclusion of our Mazatzals photo tour. Before we part ways, we invite you to visit my website and view the larger version of Saddle Mountain Silhouette by clicking this link (Jim’s Web Page) and exploring the second version on my Fine Art America site (FAA link). In the comments section below, we would love to hear how you’re coping with the heat.

Until next time,
jw

Techniques: The Advantages of Shooting in RAW

In the early days of digital photography, cameras were limited to saving images in JPEG format. However, modern digital cameras now offer the option to shoot in RAW format and JPEG, providing photographers with greater creative possibilities.

RAW files contain unprocessed and uncompressed data straight from the camera’s sensor. Unlike JPEG, which applies compression and processing, RAW files retain the original data, allowing for more flexibility during post-processing.

One of the significant advantages of shooting in RAW is its ability to provide a color depth of up to 16 bits per channel. The extra bits mean smoother gradations and a more accurate representation of colors in the final image. In contrast, JPEG images are limited to 8 bits per channel, which can lead to a loss of color information and visible banding in gradients.

RAW files are stored in an uncompressed format, ensuring that all the fine details and information captured by the camera sensor are preserved. In contrast, JPEG files are compressed, which can result in a loss of image quality and visible artifacts, especially in areas with high contrast or fine details.

RAW images can capture a more expansive color space, allowing for more vibrant and accurate colors in the final output. On the other hand, JPEG files, due to their compression and limited color depth, may exhibit color shifts and loss of detail, particularly in highly saturated or subtle color areas.

Shooting in RAW gives photographers more creative control over their images. It enables them to adjust to exposure, white balance, contrast, and other settings after you’ve taken the shot. This flexibility allows photographers to fine-tune their images to match their artistic vision and achieve the desired look.

When editing RAW images, the adjustments are non-destructive, meaning the original data remains intact. This safeguard ensures photographers can revisit their edits and make changes without compromising image quality. In contrast, directly editing a JPEG file can result in losing quality with each revision.

One of the significant benefits of shooting in RAW is the ability to convert and save images as PSD (PhotoShop) or TIFF (the Competition) files while retaining all the layers and adjustments made during editing. This feature allows photographers to maintain a master copy of their edited images, enabling future adjustments and re-editing without losing image quality.

While shooting in RAW is essential for maximum creative control and image quality, there are instances where photographers may need to save images as JPEGs. Converting the final edited image to JPEG format reduces file size and ensures compatibility for web uploads, social media sharing, or submission to specific platforms.

By shooting in RAW format, photographers have the flexibility to fully explore their creative vision and create stunning images that retain the true essence of the scene.