This morning I added another image to the New Work section of my Website. It’s called Rental Canoes at Lake Louise and I took this photograph in June this year while on our Alaska journey. I originally published the picture in the blog entry; Lake Louise – Alberta. This is the official edition as processed on my office set-up.
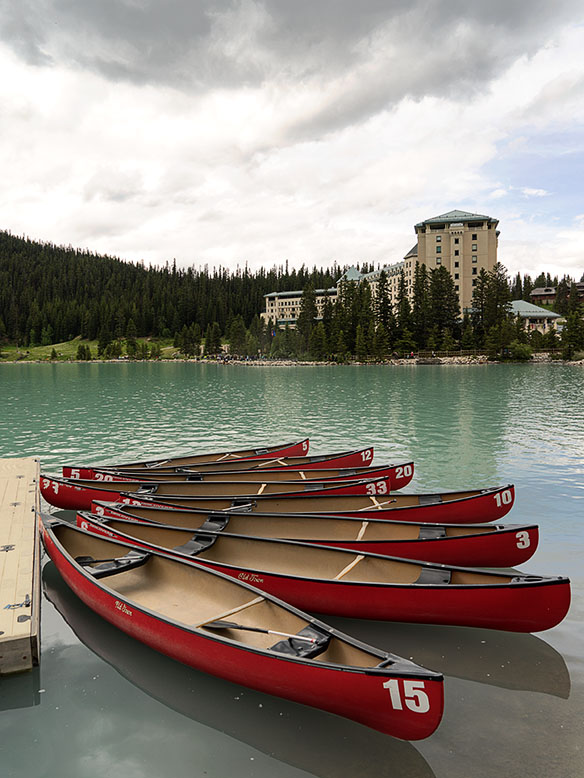
Red rental canoes tied up at Lake Louise’s dock. Since the day is rainy, there weren’t many takers.
This image is a cluster of red rental canoes tied up at the Lake Louise dock. It rained off and on during the day and only a few hearty souls ventured out onto the lake. In the background is the swanky Fairmont Chateau at Lake Louise. If you travel to Alberta Canada, Lake Louise is a must stop, and if you have the where-with-all to spring for a room and/or meal at the hotel, you won’t be disappointed; highly recommended.
Murphy’s Law strikes again (you really didn’t see that coming?), and as a result, my three frames turned into two. I’m generally pleased with how they came out, but as you would expect, there’s room for improvement. It’s that strive for perfection that keeps us going.
In the last post, I had concerns about getting the size right, because I already bought mats and glass cut to 28×20 inches. I could shave a little off of the mats, but not the glass. I wanted them to drop in the ¼ inch rabbet, but not be too sloppy. Figuring out the cut length of each side was straight forward. If you managed to stay awake in high school geometry, you’ll remember that the sides of a rectangle add up to 360°, so the four corners are 90°. The cut angle on the frame ends is half that, or 45°. The geometry teacher also went off on something called The Pythagorean Theorem, you know, the square of the long side of a right triangle is equal to the sum of the squares of the other two sides.
By now I’ve made Queen Anne’s eyes roll into the back of their sockets. Don’t worry, you don’t need to know any of that, nor do you need your calculator with a square root key. Just remember that 45° is the magic number where both short sides of the triangle are equal. Since the width of my frames from the rabbet to the outside edge is exactly ½ inch, I need to add ½ inch to the length . . . at both ends. In my design, the frames outside dimensions are 29×21 inches. Since I wanted them to fit loose, I added another 1/32 inch.
Now that I had all the calculations out-of-the-way it was time to cut some wood. The first thing it did was to set my saw’s miter gauge to . . . 55°, and made two 29 inch cuts. Then I laid them out on the table, and like a dork, I tried for fifteen minutes to figure out why they weren’t square.
After I discovered my mistake, I thought that I could salvage the two cuts by cutting them again for the short side. About my Incra miter gauge; . . . it’s very precise with stops that can be set to 1/10°. I’ve added a Incra fence to it that helps me make repetitive cuts, but it’s kind of thick and its measuring tape pivots in front of the miter gauge, so it needs resetting each time the angle changes. It’s simple enough to do; I just set the stop to 10 inches, cut a piece of scrap wood, measure the actual cut length, and then adjust the tape to match.
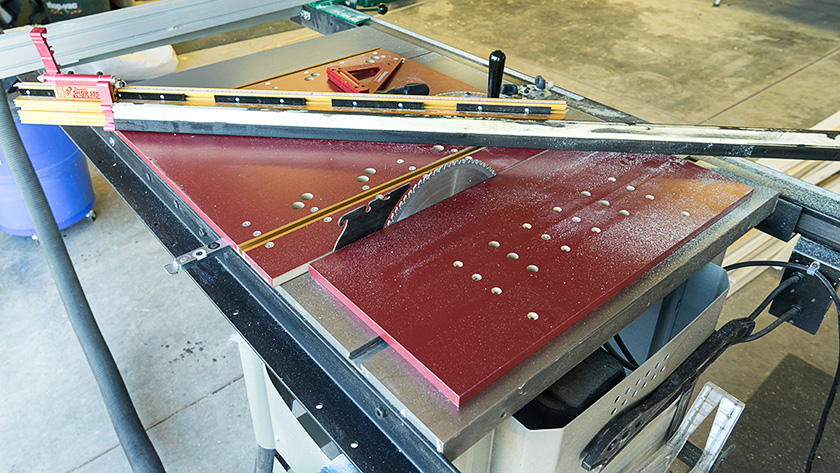
With the Incra miter gauge and fence, it’s easy to make accurate repetitive cuts. The trick is getting the set up right in the first place.
Now, I’m already recovering from one mistake and I’m mentally beating myself up, so I’m not thinking about if I change one thing, how it affects another, and I’m rushing. I set the miter gauge to 45° and double checked it and made sure all the fine adjustments were set to zero. I set the stop to 10 inches, grabbed a piece of scrap off the rack and began my test cut. As the blade goes through the wood, I notice that my brand new Tenryu carbide blade is also cutting off the corner of my Incra aluminum fence. At 55° the fence cleared the blade, it didn’t at 45°. Fortunately, the blade went cleanly through the aluminum without exploding, but I’m sure it took a beating in the process.
Notice the 45 degree angle cut on the gold fence. It wasn’t there a minute ago. Fortunately, the carbide tipped blade took the cut in stride.
I had to take a moment and step back for a breath and a few well placed words normally spelled with symbol keys. When gathered, I adjusted the fence to clear the saw blade, and cut another piece of scrap. After correcting the tape, I was ready to shorten my first two pieces. I ran the piece through the saw and realized that I held it against the fence backwards. Now it was too short.
Believe it or not, I actually did wind up cutting the rest of the pieces correctly. Once I had everything set it was easy. I just had to focus. And with the fence stop, I could take a cut off a longer piece, by cutting the first miter, flip it over and cut the other side. They came out perfect. As I said, I wound up with enough for two frames and some pieces I can eventually use for smaller frames.
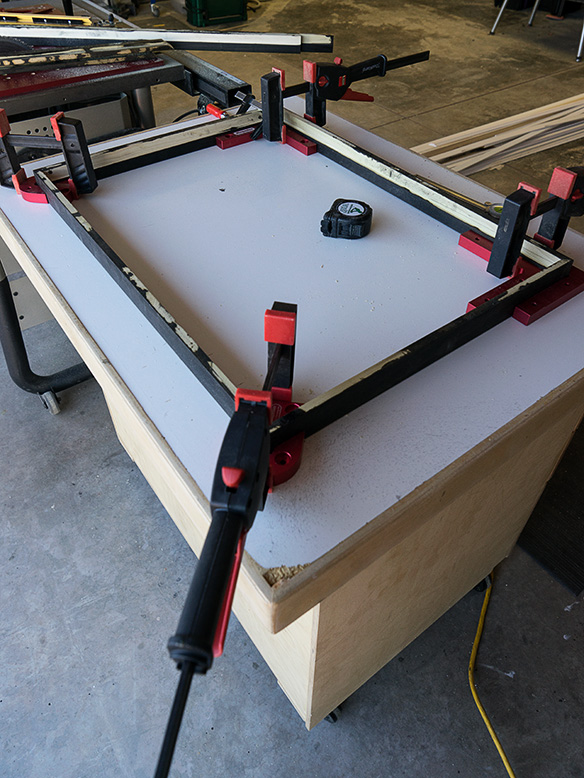
The jigs that I have let me glue up two corners of the frame at a time while the other corners are held in place with right angle aluminum corners. A better solution would be a clamp that added lateral pressure while holding the miter in place.
The next step was to glue the four sides together. I have some aluminum jigs to hold the corners together at right angles. They work really well except they don’t exert any lateral pressure to the joints. The glue has to set up without pressure. End grain joints are not very strong, so I planned on making a spline joint after they dried. That would be strong enough to hold the glass.
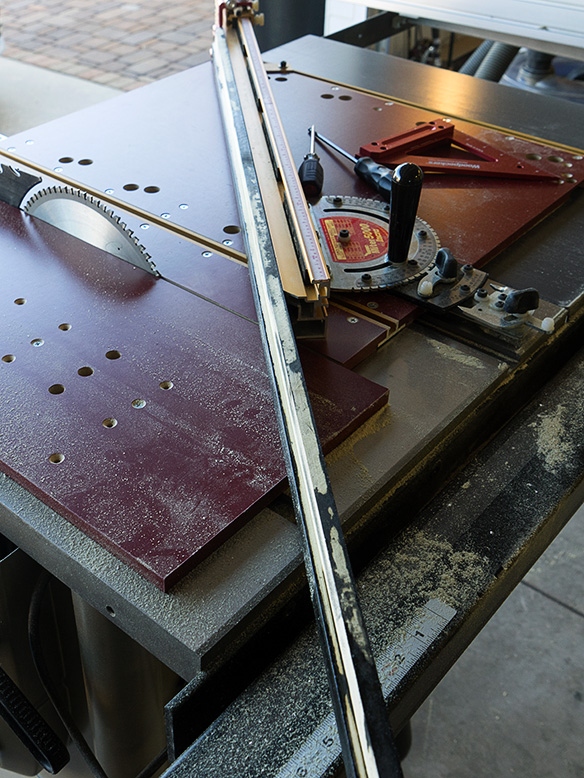
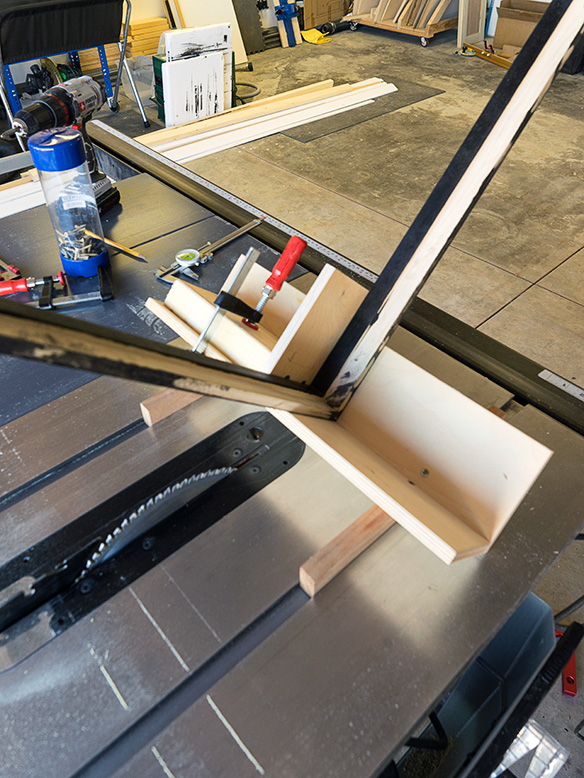
This jig was the first that I made a couple of years ago. I didn’t expect that it would take this long to use. It holds the frame upside down so a slot is cut into each corner.
After getting a table saw a couple of years ago, the first jig I made was one for cutting spline slots in frames. It’s simply two pieces of plywood attached to a couple of mesquite runners. It holds a frame (or box) at an angle so you can run it through a saw. Then you cut wood in 1/8th inch slices and glue them into the open slot. After they dry, you trim off the excess, sand and finish. Since this was the first time I used it, I set the depth of the saw blade too deep. It needs to be less than the thickness of the wood piece you’re slicing. I was using standard one by (4×4), so I shouldn’t go any deeper than 5/8 inch into the frame.
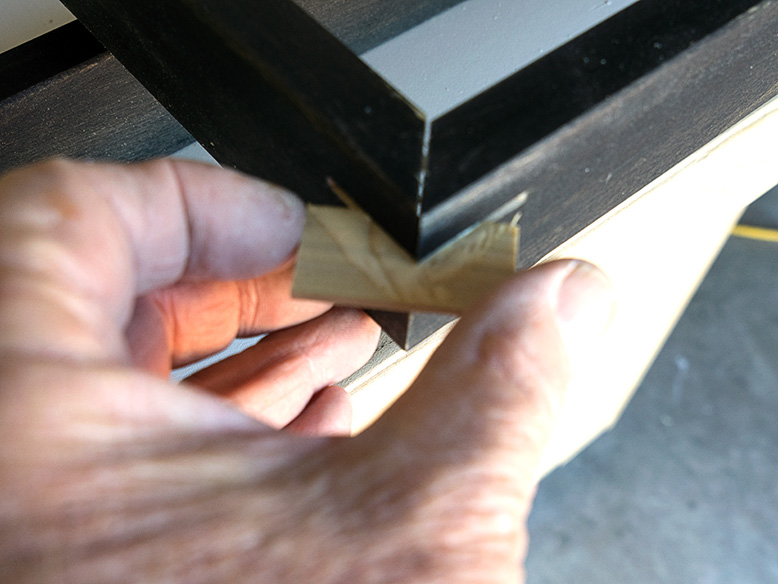
A piece of wood, cut to the thickness of the slot, is glued in the corner to reinforce the joint. After it dries, the excess then trimmed and sanded flush.
Finally there’s the finishing fiasco. I wanted to have my frames ready for the Museum Show last week, so I used materials on hand. I wanted a black stain with a clear top coat. The local hardware only had oil based stains on hand and I use normally use a water based finish coat, so mixing the two isn’t possible. I decided I could spray some shellac and lacquer for the last finish and bought a couple of cans of both. When I put a coat of shellac over the black stain as a sanding sealer, it looked good . . . until I started sanding it. The sandpaper took off the shellac and most of the black stain. It looked retched.
I didn’t have water-borne black stain, but I did have a very dark brown. I mixed it with the acrylic sanding sealer in a one to one mix and brushed it on the frames. After it dried, I tried sanding it, and even that quickly got down to the base wood. The stain hadn’t penetrated the poplar enough to keep the color during sanding. As a last resort, I applied two coats of the colored sanding sealer letting the frames dry after each coat.
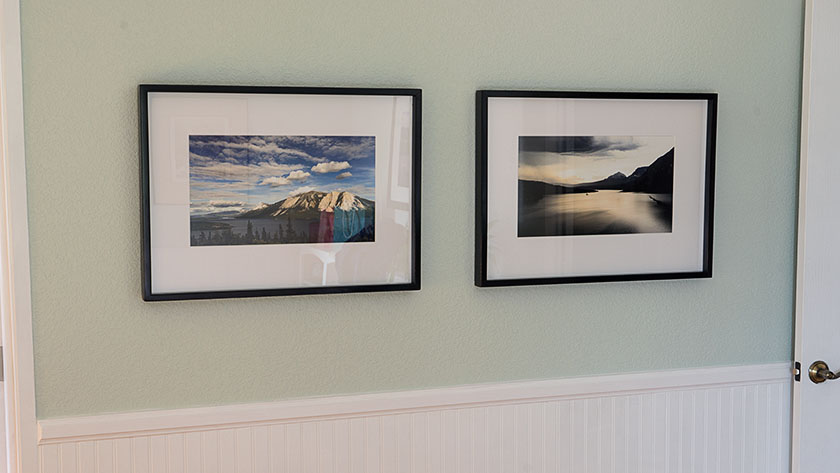
On close inspection, they look awful, but are good enough at a distance. Fortunately they weren’t lit up with a hot spotlight at the show, so they looked good in the dark. After the show, we hung the framed prints in the bedroom where they look just fine.
Well, . . . they’re finished until I get the process under control and make better ones. I wouldn’t sell this pair, but as prototypes, they do what I wanted . . . raise the print away from the wall and simply set off the image.
I’m going to try another type of wood on my next frames. I’m thinking about birch or alder. They’re in the price range of poplar and neither of the former has the green streaks of the latter. I’m leaning towards the birch, because I understand it’s easier to work with than the maple I’ve worked with in the past.
In my last post, I talked about getting some framed prints ready for a Jury Review. I had three frames that I repainted and printed the images to fit them. Although they came out nice and I got a positive comments about them, I’m not really satisfied with store-bought frames. They chip and dent rather easily and the wood they used is hard to re-finish. Besides, the ready-made frames don’t come in the format that I want to use for some of my 16:9 landscapes.
Since I have woodworking tools, I’ve decided to try making my own frames. I’m relatively new to woodworking, but after a few YouTube videos, I convinced myself to give it a shot. The worst that can happen is that I waste time and a couple sticks of lumber.
I think photograph frames should be simple and not upstage the art. I like the thin metal kit frames, but on a large image they‘re out of scale. I also want the image to stand away from the wall, and not be on the same plane. I want a black color, but with some grain, so I want them stained and not painted.
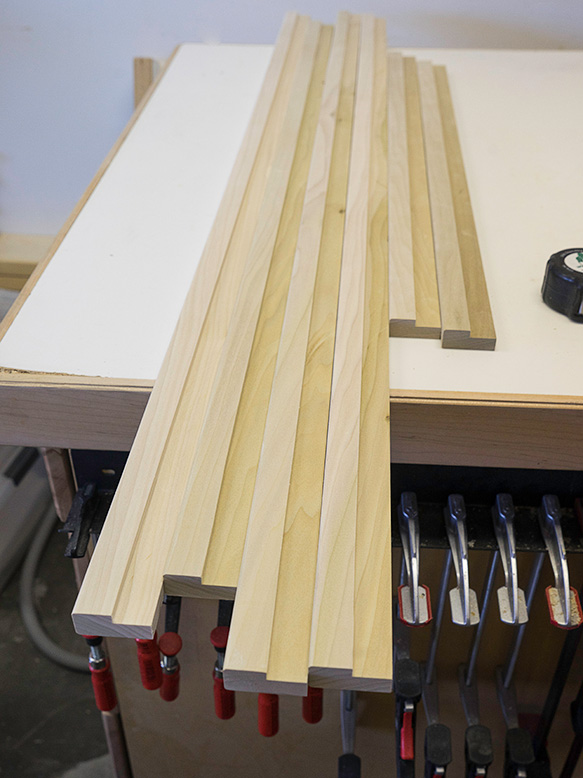
Out of the three pieces of poplar that I had, I was able to cut six lengths for my frames. That should be enough to assemble three frames.
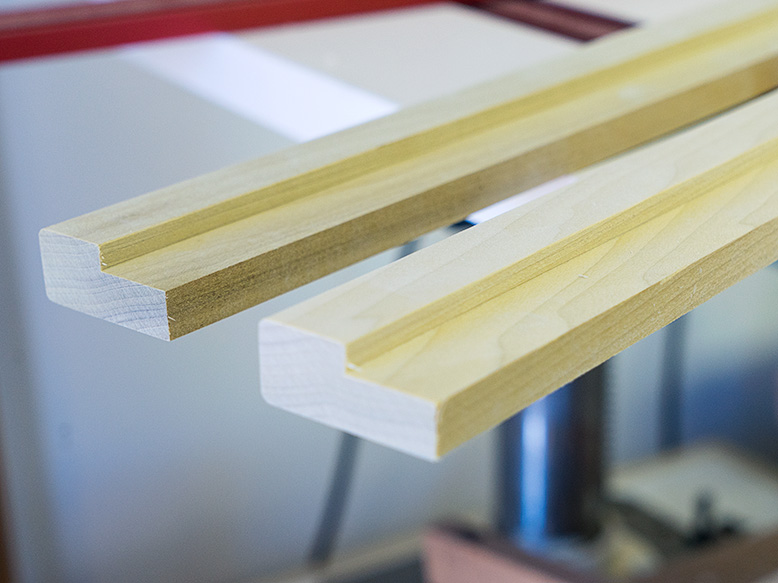
I had several pieces of poplar left over from other projects so I pulled them out and began milling them to size. To keep the frame simple, I used the ¾” edge for the front face and cut uniform strips 1 ¾” wide. The next step was to route a ¼ rabbit for the glass, mat and backing to sit in. Finally I rounded off the front faces with a ¼” radius. With the pieces all cut, I put a black stain on them today.
I want the framed image to stand away from the wall, so I cut the pieces deep with a generous rabbit.
I’m going to give the stain plenty of time to dry, so I set them aside until Friday. Then, I’m going to cut the angles to length and glue them together. Since I already have the glass for them, I’m a little nervous that I cut them to the right size. To make sure they are, I’ll cut them a little large at first and sneak up on the final length until they’re perfect. I’ll start by cutting one and when I’m convinced I’ve got the measurements right, I’ll continue with the other two.
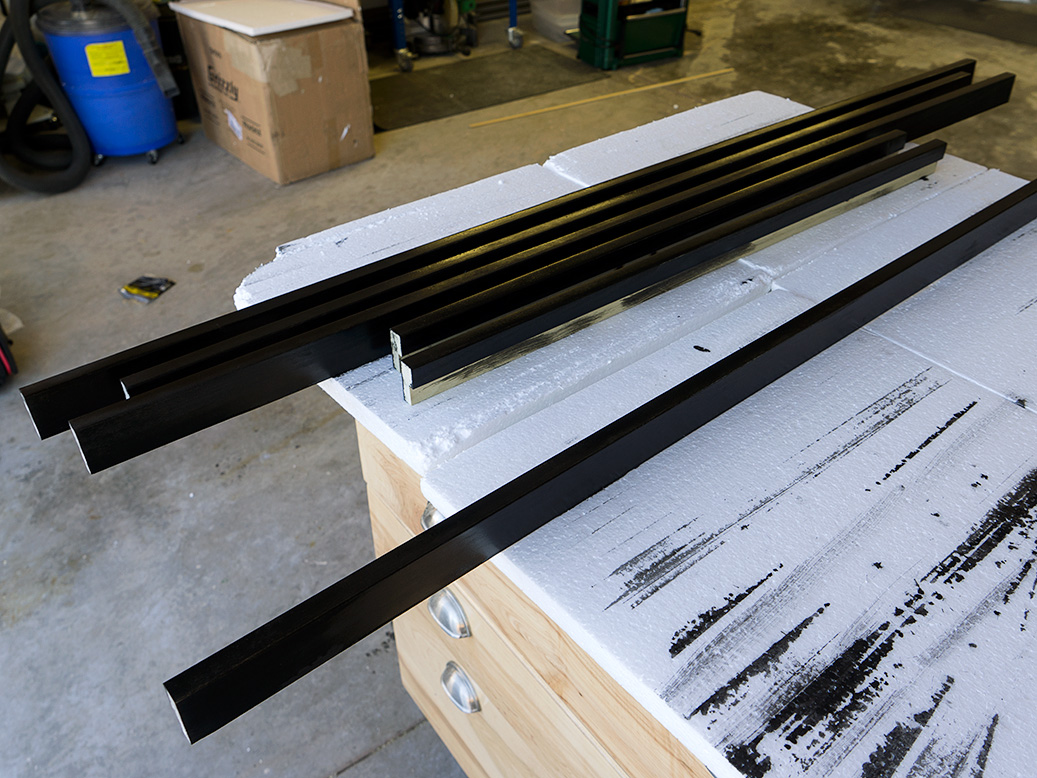
This is the poplar with two coats of black stain applied. After I cut and assemble the pieces, I’ll put a coat of sanding sealer and a couple coats of clear finish.
When you move into a new place, it’s important to get a lay of the land. You need to know pretty quickly where the grocers, hardware, doctor and barber shop are. Finding ones that you care to patronize is some times easy; others take a bit of time. For example, if you have several choices, you may have to visit all the barbers before you find one that doesn’t talk too much.
The same thing holds true with my photography. With Phoenix an hour away, I needed to learn what the locals did for supplies and how they got their work out to the public. One of our neighbors, Jane, suggested that I attend the local photography club meetings as a way to shorten my learning curve, so I did. These days, the internet is your best source for art supplies regardless of where you live. But, in Wickenburg, there is a protocol for getting work out to the public.
In Wickenburg, calls for artists are put-out through the Wickenburg Art Club (WAC), of which the photography group is a part. There are two requirements that the club has. The first is you are a club member (of course) and the second is that you be a juried artist. After moving here last year, I missed several chances to hang my work, so I decided to send examples of my work for jurring.
To submit for this process, I had to sign up at the beginning of the month to get in on the review last Saturday. I had to pick out three examples of my current work (within the last four years), and drop them off at the meeting room, framed and ready to hang. I have plenty of framed prints, but only one that was less than four years old, so I needed to pick out two newer images to print and put into frames.
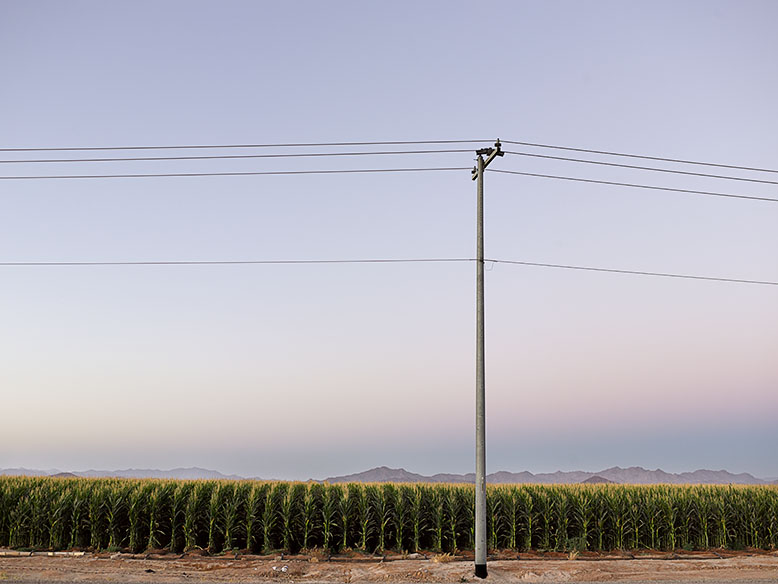
I didn’t want to limit my entry to one project, so I picked out a print of Corn Power; the keystone image of my West Side project. That made life easier because I had one in the frame already .
This is the keystone image from my West Side project. It was shown in a Scottsdale gallery last year, so I already had a framed print.
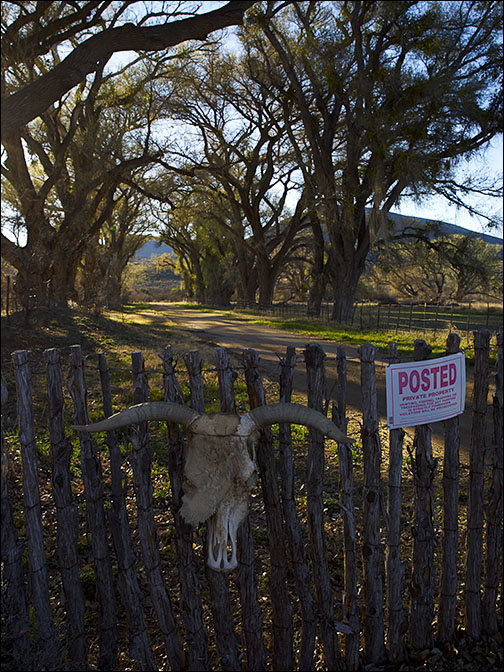
As an example of the kind of work I’ve been doing since moving, I chose the image Posted, which has created good Web traffic.
A gate decorated with a cow skull and Posted sign, blocks a tree-lined drive.
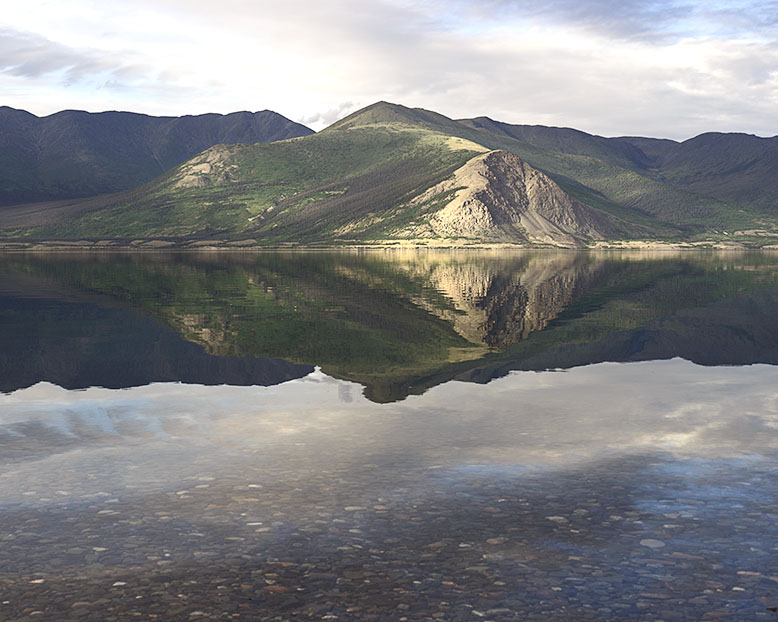
For my last image, I selected Kluane Lake and Ruby Range, a photo that was September’s Picture of the Month. This is one of the images that I got on the Alaska trip. I was kind of partial to it, and I wanted to see it in print anyway.
This was my September Picture of the Month and was taken this summer in the Yukon Territories. Because of the mats that I had in stock, I had to crop this version in a 4:5 ratio and not the 16:9 version that I prefer. Check out both versions and tell me which you like better.
After making my selections, I had to come up with some 16×20 prints. I had two obstacles to overcome. I was out of that size paper, and my large format printer hadn’t been turned on for a year. I was sure the ink was dried solid by now. Ordering a box of paper wasn’t even simple. Harmon had dropped the warm-tone version that I’m set-up for and now only offers it in cool white. That means that I’d have to create a new printer profile so the colors would come out right.
B&H Photo had a good price, so I ordered a box of paper and just beat the Rosh Hashanah holiday closing (B&H doesn’t take orders after Friday’s sundown or on holidays). With paper on its way, the next task was to get the printer up a running. My Epson 3880 replaced an earlier one that quit working because of severe ink blockage; even after replacing all the cartridges. I was very afraid that I would have the same problem with this one. After turning it on though, it printed a test page, so I ran it through several cleaning cycles before attempting to make a paper profile. It took another dozen cleaning cycles before I got a decent looking print.
The next step was to pick out a couple of frames. The pair that looked the best had nicks and scratches, so I would have to repaint them. That sounds easy enough, but the Krylon wouldn’t come out of the can evenly, and I had to buff them with Scotch Brite pads to get a uniform finish.
After two weeks of working diligently, I had my three framed prints and anxiously dropped them off at the hall for jurying on Saturday. We weren’t allowed to hang around and watch, because it was done behind closed doors. Three jurors examined the works, one of which was an expert in your medium, but we had no idea who they were. If only one of the three said yes to any of your three pieces, you were golden. Our only instructions were to come back at 1:00 to pick up our submitted work along with a sealed envelope which contained the Yeah or Neigh results and maybe judges notes.
Shortly after 1:00, I showed up the door where I got my envelope that I nervously shoved into my pocket. After loading Fritz with my frames, I climbed behind the wheel and fished out the results and tore open the envelope. All three pieces were marked ‘Yes’ along with some very nice notes from the jurors. What a relief. Now I am a juried Wickenburg artist. Yeah!