
The Wickenburg Art Club photo classes have started and have brought some surprises that we hadn’t anticipated. We had more attendees than we expected. Over twenty people have shown up each week and they’re asking questions and fully participating. The other thing that surprised me was how many people want to learn how to use the camera on their smartphone. Stan Strange—our resident iPhone expert—conducted the phone class and he was surprised that in his session Android devices outnumbered the Apple phones three to one.
Since Stan didn’t have a lot of experience with the Android Operating System, I decided to do a little research to help out and because I’m ignorant about smart-phones I had to learn the basics. For me, that means getting the images out of the phone and into a computer so you can do editing on an adult size screen. With my old-guy eyes, I can’t see anything on those tiny phone screens. Besides, although I don’t own a smartphone—or any cell phone for that matter—Queen Anne does and she’s collected enough stuff in the last year that she was out of storage space, so we killed a couple of birds using one stick.
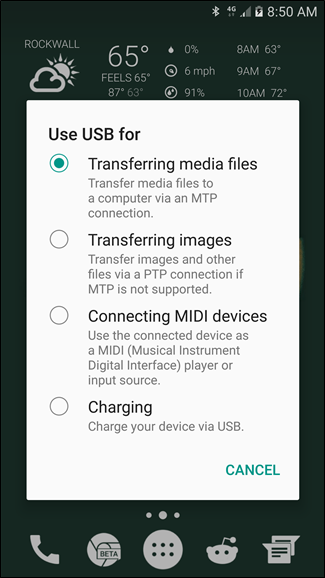
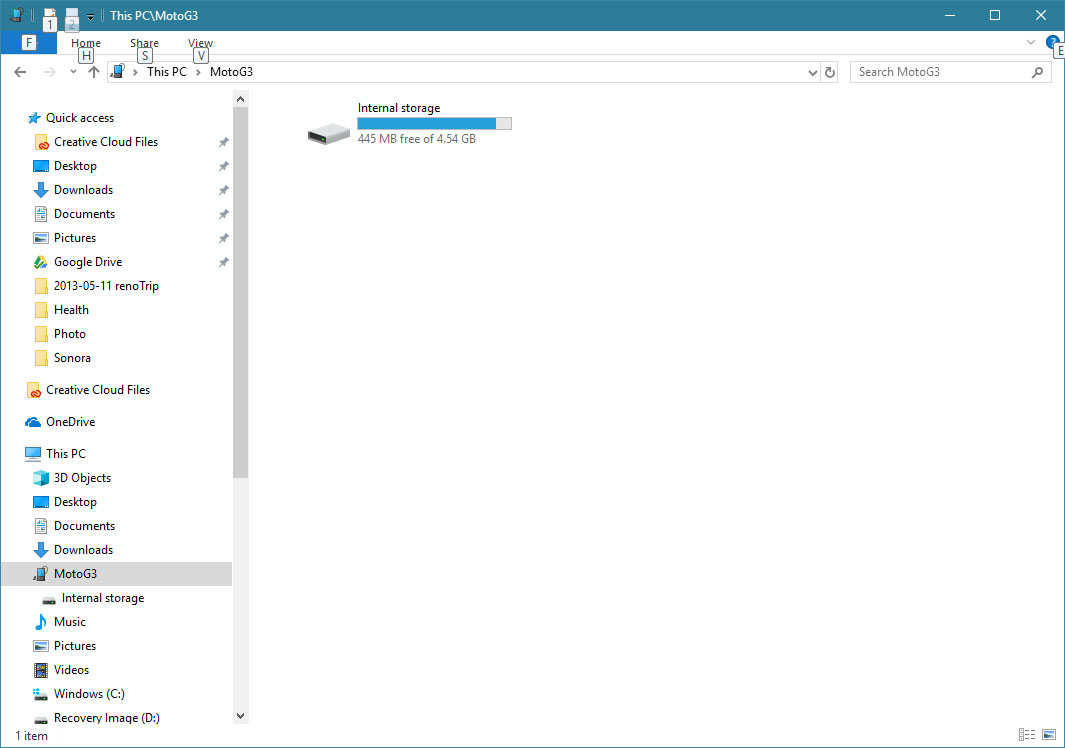
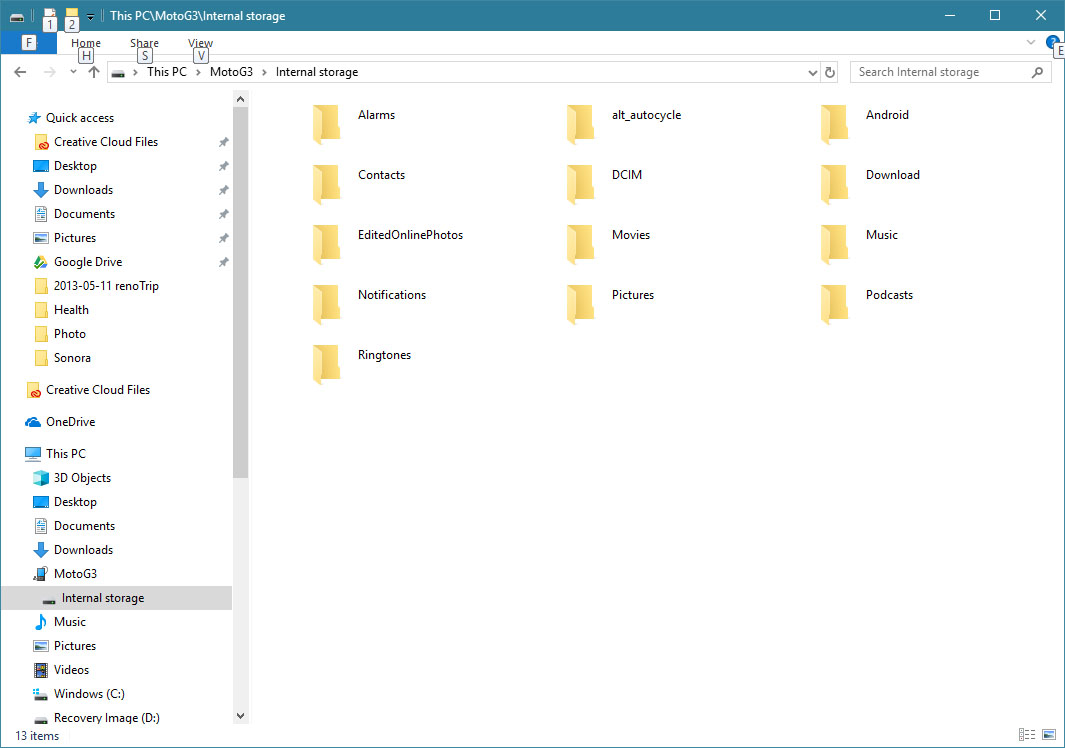
Having a computer background, I foolishly thought that all that I needed to do was to connect the phone and computer with a USB cable, but when I did that, I got a message in the file window saying, “This folder is empty.” What I didn’t know is that the phone has to be set up to talk with the computer. Anne’s phone was configured so the USB port could only be used for charging. This is an easy fix. While the phone is connected to the computer via USB cable, touch and hold the area at the screen’s top—where the time and battery icons are—then drag down toward the screen’s center. There should be a box labeled “USB Configuration.” If you tap on that banner, it will open an applet that exposes the settings to configure the port. For picture transfers, you want to select: “Transferring Media Files” Once you select that option the phone will expose the phone’s files to the computer. Now in Windows Explorer (if you’re using a Mac computer, you’ll need to get specific instructions elsewhere, but they’re generally the same) your phone’s data should show up (either as a phone or a storage device) as a new drive letter and when you open it you will see an item that says “Internal Storage” or something like that. Once you open that item by double-clicking it, there will be a display of the various folders inside.
By consensus, camera manufacturers store images in the DCIM folder, either at the root level or, as in Anne’s phone, a sub-folder named Camera. Once you’ve found your images you are ready to copy or move them to your computer. Unless you have created a specific folder for holding your transfers, you can copy or move your photos from the phone to the computer’s Pictures file you can see in the left frame. You can either drag each image or manually copy and paste if that’s your preference.
If you only shoot a couple of pictures a month, keeping your images in the Pictures directory will work, but if you’re like me and you’re shooting hundreds or thousands of photos a year, you may want to consider a better file strategy. That’s a topic that I’ll talk about in my next photo tip installment.
Until next time — jw