Mount Ord’s Pine-Covered Heights Picture of the Week - Rye, Arizona

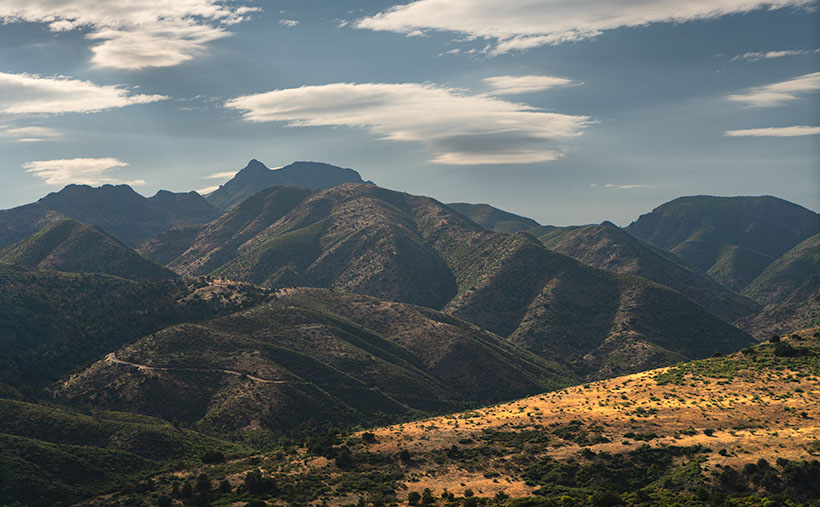
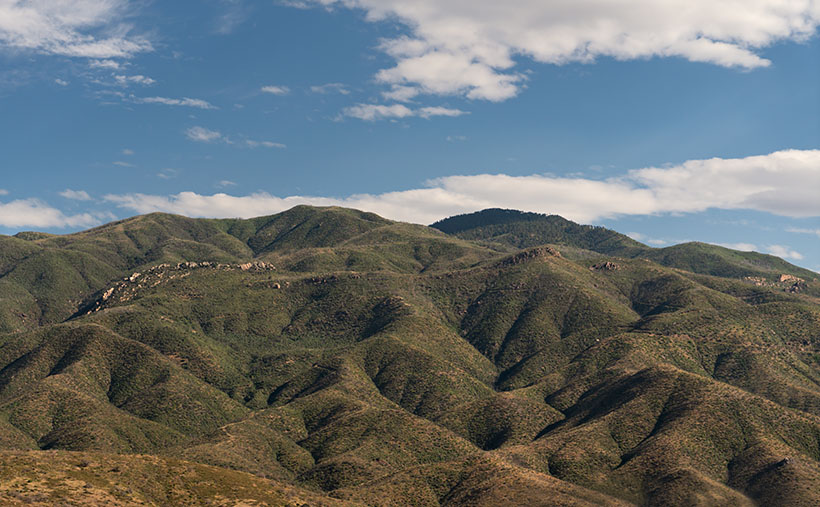
Mount Ord from the west side, showing its majestic peaks and pine-covered heights.
Mount Ord’s Pine-Covered Heights – Behold the awe-inspiring Mount Ord as it stands tall, adorned with lush pine-covered peaks. The afternoon sun casts its warm glow, revealing the rugged beauty of this majestic mountain.

Welcome back to the final episode of our Mazatzal Mountains tour. This week, our magic bus has made it over the last mountain pass, and we’ve stopped in Rye, the quaint community nestled at the bottom of the final grade leading to Payson. Here, the Beeline Highway exits the Mazatzals, bidding farewell to the majestic mountains that have enchanted us throughout our journey.

This week’s featured photograph, Mount Ord’s Pine-Covered Heights, captures the awe-inspiring grandeur of this majestic peak. Standing tall at 7,128 feet, its proud summit is crowned by a lush and verdant pine forest, gazing serenely at the world below. Mount Ord’s presence commands the landscape like a sentinel guarding the horizon. While it may not claim the title of the tallest peak in the Mazatzal Range (that honor goes to the 7,903-foot Mazatzal Mountain hidden behind the camera), being the highest point in Gila County is no small feat—perhaps deserving a participation trophy for its natural splendor.

Near the mountain top, the dark green foliage is an honest-to-goodness pine forest. It’s a sight to behold, and, unfortunately, a locked gate restricts access to this cool, refreshing forest on the unpaved service road leading to the summit. However, the image allows us to appreciate the beauty of this hidden gem from a distance.

Another fascinating feature in the photograph is a rugged and dramatic limestone layer emerging from the Earth’s embrace, seemingly carved by the hands of ancient giants. These yellowish rocks bear the story of a primordial ocean, etched into their very essence through eons of geological transformations. This layer of limestone formed millions of years ago in the sea and was later thrust into its current location during the continental crash that shaped the Rocky Mountains. This geological history makes the Mazatzals a part of the fender dent of that ancient collision.
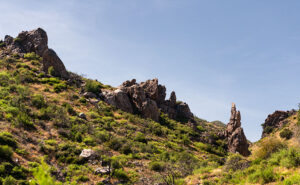
Close-up of an exposed limestone ridge, showcasing its jagged and fractured formations.
Jagged Elegance: The Thrust of Limestone – Intricate and sharp, the exposed limestone ridge reflects the Earth’s geologic history. Bathed in the warm glow of the backlit sun, this natural sculpture reveals the forces of nature at work.

The second image we’ve posted this week is a closer look at the limestone layer on the west side of the highway. One particular jagged piece looks like a shard of glass ready to be used in a bar fight. I’ve also captured a beautiful Claret Cactus in full bloom for those seeking variety beyond the rocks.
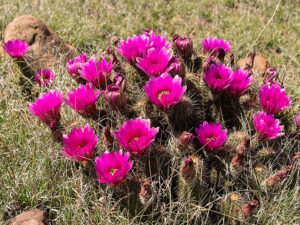
Close-up of a claret cactus with its vibrant, sunlit flowers in full bloom.
A Burst of Color: Vivid Claret Cactus Flowers – Midst the desert landscape, the claret cactus graces us with its vivid flowers, glowing like radiant gems in the sunlight.

We hope you’ve enjoyed our magic bus excursion through the Mazatzals and that you’ll appreciate the beauty of these mountains, even more the next time you drive up to Payson. As always, I invite you to view larger versions of “Mount Ord’s Pine-Covered Heights” on my website by following this link [Jim’s Website] or on Fine Art America using this link [FAA Page].

Next week, prepare to venture off the beaten path as we leave the comfort of our magic bus behind. In embracing cooler climes and untouched wilderness, we’ll embark on an invigorating hiking adventure to uncover the hidden gems of nature’s gallery.

Till next time,
jw

Techniques: Mastering Back Lighting

In photography, an outdated rule advises shooting your subject with the light behind and to the side of the camera. While this approach works well in about 80% of cases, there’s still the other 20%—those tricky backlit situations. Today, I’ll share how I tackle such challenging conditions during the shoot, and next week, we’ll delve into post-processing in PhotoShop to perfect these images.

A common concern in modern digital photography is preserving the highlighted details in a scene. Overexposing the highlights can lead to blown-out areas and loss of detail and information. Fortunately, many cameras, including mine, have a helpful tool to address this—the zebra stripes.

Zebra Stripes - The stripes are an exposure tool that warn you when the light is too bright for the camera sensor to capture.
Zebra Stripes – These are an exposure tool that warns you when the light is too bright for the camera sensor to capture.

Zebra stripes are diagonal lines that appear in your viewfinder, indicating areas where the light is too bright to be captured by the sensor. You can control when and where these stripes appear by setting the zebra threshold in your camera’s menu. For my workflow, I put the value to 100% to ensure a clear indication of potential overexposure.

Zebra stripes might appear in the sky or other bright areas when shooting in backlit conditions or during early morning or sunset. To tackle this, I slowly point my camera toward the bright area the stripes indicate until they disappear. This process helps me find the minimum exposure adjustment needed to avoid blowing out the highlights. Once the lines vanish, I half-press the shutter button to lock in the focus and exposure.

While holding the shutter button half-pressed, I recomposed the scene to my desired composition before fully pressing the shutter to take the shot. Finding the right half-press point takes practice, but with digital photography, you can afford to experiment and learn from your results.

Remember that when you review your shots taken using this method, the sky, and clouds might look perfect, but the ground could appear too dark with limited details. Don’t worry; next week, we’ll explore post-processing techniques in PhotoShop to enhance these images and achieve the perfect balance.

Until then, practice your zebra dance and keep saving those highlights!

Saddle Mountain Silhouette: The View from Rincon Pass Picture of the Week - Sunflower Arizona

Majestic view of Mazatzal Range with Saddle Mountain silhouette at Rincon Pass.
Saddle Mountain Silhouette: A View from Rincon Pass – A picturesque landscape of the Mazatzal Range unfolds, revealing a symphony of layers and the iconic silhouette of Saddle Mountain at Rincon Pass.

Welcome back to the fourth installment of our Mazatzal Mountain tour via the Beeline Highway. With the current heat wave, our bus feels more like a scene from Romancing the Stone, filled with hot and sweaty people trying to stay cool with all the windows down. It’s so scorching outside that even chickens tied to the grill seek shade.

Of course, leave it to Queen Anne to pick the hottest week for our trip to the dentist in Algodones, Mexico. We left our comfortable haven in the Weaver Mountain foothills, where the air conditioner doesn’t run all night, only to be greeted by 115°F heat in Yuma, the lowest point in Arizona. Queen Anne’s flip-flops even melted away, forcing us to make an emergency shoe stop at a Zapata store. The trip’s highlight was the customs house with no waiting lines—small blessings in the sweltering inferno.

But enough of the heat woes; let’s escape to cooler grounds. This week’s destination is just a few miles north of our last stop, but we’ve left the Sonoran Desert behind. The newer section of the highway bypasses the shady beauty of Sycamore Creek, where there was always a respite from the sun. The creek lies on private property, and I imagine the owners are delighted to be rid of the traffic.

I pulled over near Iron Dike, a black rock mound, to capture this week’s featured image, Saddle Mountain Silhouette. In this shot, we gaze beyond the hilltop and the intricate jumble of mountains and canyons to Saddle Mountain—a fitting name for its distinct profile. Standing at 6529′, it doesn’t make the top ten of the Mazatzal’s tallest peaks, but its imposing presence seems to watch over the surrounding lesser hills.

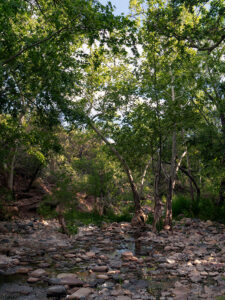
Sycamore Creek flowing amidst lush greenery and tranquil waters.
Tranquil Waters: Sycamore Creek’s Verdant Beauty – Embrace the serenity of Sycamore Creek, where the gentle flow of water and vibrant greenery create a symphony of tranquility.

After capturing this shot, we took a refreshing detour down the old road, seeking relief from the heat under the cool canopy of sycamore leaves. Though the creek’s flow was modest, it still managed to cool the air, acting like nature’s swamp cooler.

We’re thrilled you’re along for the ride this week, and we hope to have you back next Sunday for the conclusion of our Mazatzals photo tour. Before we part ways, we invite you to visit my website and view the larger version of Saddle Mountain Silhouette by clicking this link (Jim’s Web Page) and exploring the second version on my Fine Art America site (FAA link). In the comments section below, we would love to hear how you’re coping with the heat.

Until next time,
jw

Techniques: The Advantages of Shooting in RAW

In the early days of digital photography, cameras were limited to saving images in JPEG format. However, modern digital cameras now offer the option to shoot in RAW format and JPEG, providing photographers with greater creative possibilities.

RAW files contain unprocessed and uncompressed data straight from the camera’s sensor. Unlike JPEG, which applies compression and processing, RAW files retain the original data, allowing for more flexibility during post-processing.

One of the significant advantages of shooting in RAW is its ability to provide a color depth of up to 16 bits per channel. The extra bits mean smoother gradations and a more accurate representation of colors in the final image. In contrast, JPEG images are limited to 8 bits per channel, which can lead to a loss of color information and visible banding in gradients.

RAW files are stored in an uncompressed format, ensuring that all the fine details and information captured by the camera sensor are preserved. In contrast, JPEG files are compressed, which can result in a loss of image quality and visible artifacts, especially in areas with high contrast or fine details.

RAW images can capture a more expansive color space, allowing for more vibrant and accurate colors in the final output. On the other hand, JPEG files, due to their compression and limited color depth, may exhibit color shifts and loss of detail, particularly in highly saturated or subtle color areas.

Shooting in RAW gives photographers more creative control over their images. It enables them to adjust to exposure, white balance, contrast, and other settings after you’ve taken the shot. This flexibility allows photographers to fine-tune their images to match their artistic vision and achieve the desired look.

When editing RAW images, the adjustments are non-destructive, meaning the original data remains intact. This safeguard ensures photographers can revisit their edits and make changes without compromising image quality. In contrast, directly editing a JPEG file can result in losing quality with each revision.

One of the significant benefits of shooting in RAW is the ability to convert and save images as PSD (PhotoShop) or TIFF (the Competition) files while retaining all the layers and adjustments made during editing. This feature allows photographers to maintain a master copy of their edited images, enabling future adjustments and re-editing without losing image quality.

While shooting in RAW is essential for maximum creative control and image quality, there are instances where photographers may need to save images as JPEGs. Converting the final edited image to JPEG format reduces file size and ensures compatibility for web uploads, social media sharing, or submission to specific platforms.

By shooting in RAW format, photographers have the flexibility to fully explore their creative vision and create stunning images that retain the true essence of the scene.

Mountains, Canyons, and Sycamore Creek: Swimming in the Beauty of Arizona’s Wilderness Picture of the Week - Sunflower, Arizona

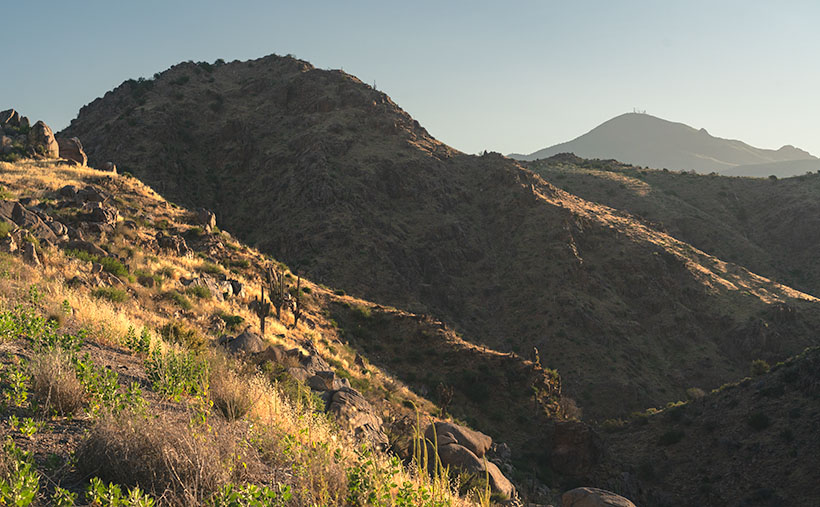
Scenic view of the Mazatzal Mountains and Sycamore Creek Canyon in Arizona.
Mountains, Canyons, and Sycamore Creek: Swimming in the Beauty of Arizona’s Wilderness – Immerse yourself in the breathtaking beauty of the Mazatzal Mountains and the picturesque Sycamore Creek Canyon.

Welcome back to our journey through the picturesque Mazatzal Mountains, where nature’s timeless artistry unfolds beneath our feet. In our continued exploration, we delve into the geological wonders that have shaped this majestic range, revealing the secrets of its ancient past. Join us as we uncover the captivating stories etched in rock and discover the remarkable forces shaping this rugged landscape.

With this terrible heat, wouldn’t it be nice to walk into Baskin Robbins and order a delicious burgundy-cherry cone? Although the ice cream cools your tongue, the heat melts it so fast you have to lap it up to keep it from running down your arm, and you get brain freeze. Wait, I can make it better. What if you returned inside with the empty cone and asked for a free refill? That’ll never happen, but that’s sort of the geological story of the Mazatzal Mountains.

The Mazatzal Mountains, with their rugged beauty, hold within their rocky layers a fascinating geological history that spans millions of years. Formed through intense tectonic activity and volcanic eruptions, these ancient mountains have witnessed the collision of ancient island arcs with the North American continent, creating a massive mountain range. Over time, erosion and subsequent uplift events shaped the Mazatzals into the awe-inspiring landscape we see today. Composed primarily of Precambrian and Paleozoic rock formations, these mountains showcase the power of tectonic forces, as evidenced by their uplifted and tilted nature.

On our imaginary drive through the Mazatzal Range, we reached Rincon Pass near Crabtree Butte. We stopped at this spot to shoot this week’s featured image. East of the Beeline Highway is a 400′ deep canyon carved by Sycamore Creek on its journey to the Verde River at Fort McDowell.

As we stand at the top, soaking in the awe-inspiring beauty of the canyon, the west-facing slopes still lie in shadow while the rising sun casts a warm and enchanting glow on our side. Like interlocking fingers, the ridgelines gracefully descend into the canyon, creating a mesmerizing pattern of diagonal lines. Through the distant haze, our eyes are drawn to Mount Ord, adorned with a majestic crown of communication towers. Rising to an impressive height of 7,128 feet, it proudly claims the title of the highest point in Gila County. Amidst this picturesque scenery, we can’t help but feel a sense of hidden treasure, including the irresistible allure of a rumored swimming hole waiting to be rediscovered.

My previous dentist told me that there was a deep swimming hole at this canyon’s bottom. It held cool water throughout the year, where you could soak in complete isolation. He was an avid backpacker, so we took his word for it. I can’t vouch for his story because the creek isn’t visible from the highway. The only way to verify his story was by hiking down to it. As I’ve whined before, I’d need a personal riding drone—but I’ve grown older since then, and today, I’m looking for a flying walker.

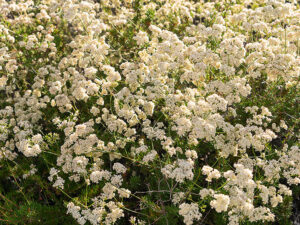
Close-up of a desert bush adorned with delicate white flowers in Arizona.
Weeds or Wildflowers? – Witness the delicate beauty of native Arizona flowers as a desert bush showcases its intricate white floral clusters.

As we conclude our stop at the top of Rincon Pass, we find ourselves halfway to Payson, but our adventure through the breathtaking Mazatzals is far from over. The beauty and allure of these mountains extend beyond the Beeline Highway, waiting to be discovered on either side. If you’d like to experience a larger version of Mountains, Canyons, and Sycamore Creek, click on this link (Web Version) to visit the web page or this link (FAA Version) to view my upload on Fine Art America. Join us again next week as we take a refreshing detour along the enchanting Sycamore Creek.

Till next time
Jw

Technique: Setting an image’s black point and white point

Ansel Adams was the master photographer that influenced my work the most. Setting aside his spectacular subject matter and sense of composition, I’m awed by the full range of tones he got in his prints. If you’ve never seen one in person, you’re missing out—the reproductions in magazines and books are different. It’s the equivalent of listening to your favorite music on a cheap transistor radio instead of a live performance. The tune is recognizable, but the song’s not right without the deep bass and sparkling trebles.

Throughout his long career, Ansel worked with a technique called the Zone System. In those days, black and white photo paper could only reproduce ten distinctive shades of gray from the blackest black (zone 0) to paper white (zone 10). His experience meant that he could look at a scene and visualize how it should look on paper. He got his desired results using different exposures, developers, papers, and toning. I tried to learn the Zone System, but I’ll never be that meticulous.

Fortunately for those like me, digital photography has made it easier to master getting full-range photographs, and the PhotoShop tool I use is Levels (all photo editing software have a variation of this tool). After cropping and color balance, my workflow’s third step is setting the black and white points. So I can go back and tweak it later; I always work with adjustment layers.

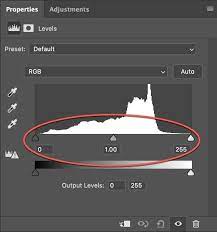
A screen shot of PhotoShop's Levels Tool.
PhotoShop’s Levels Tool – This handy tool makes setting the black and white points in photographs easy.

You can make several modifications with the Levels Tool, but I’m a simpleton, so I use the default settings and only make these small changes. Within the tool, a histogram (graph) sits on a baseline and three sliding arrows beneath it. Under the arrows are three boxes with value numbers tied to the sliders. If you move the arrow, the numbers change; if you change the number, the slider moves.

To set the black point, I move the left arrow to the right until it aligns with the graph’s left value. The right arrow will affect the white point, so move it to the left until it’s under the graph’s right end. If the histogram goes from wall to wall, the points are already good, don’t mess with them. I’ve done this process so often that I can usually type in the needed values. The final setting I make with the Levels Tool is setting the midpoint. Its default setting is 1. If my image is for the internet, I set the midpoint (gamma among the in-crowd) to .90 by shifting the center arrow to the right. If I’m making a paper print, I need to lighten it, so I move the center arrow left to set the value to 1.10 (the difference is that the first is a translucent light source, and the second is a reflective light source). After you’ve made your adjustments, you can click on the eyeball icon to turn the layer on and off to see the effect. Your picture will look livelier with rich blacks and sparkly whites.

Have I thoroughly confused you? Well, good. To help you, I found a YouTube tutorial explaining the levels tool (YouTube Levels Tutorial). You can ignore all the other gibberish in this video, but pay attention to his explanation of Adjustments vs. Adjustment Layers and what happens when he moves the sliders. After you watch the clip, you can return here and reread this section—it will make much more sense then.