I’m often dumbfounded when I encounter snowbirds flocking at the Denny’s cash register complaining about our January rain. Frequently, I’ll interrupt their griping with local folklore. I’ll say, “The natives have a word for this weird weather pattern.”
“Oh ya,” their curiosity peaks, and they’ll ask, “What do they call it?”
“They call it winter,” I respond as I walk past them out the door, but I can always hear their groans behind me.
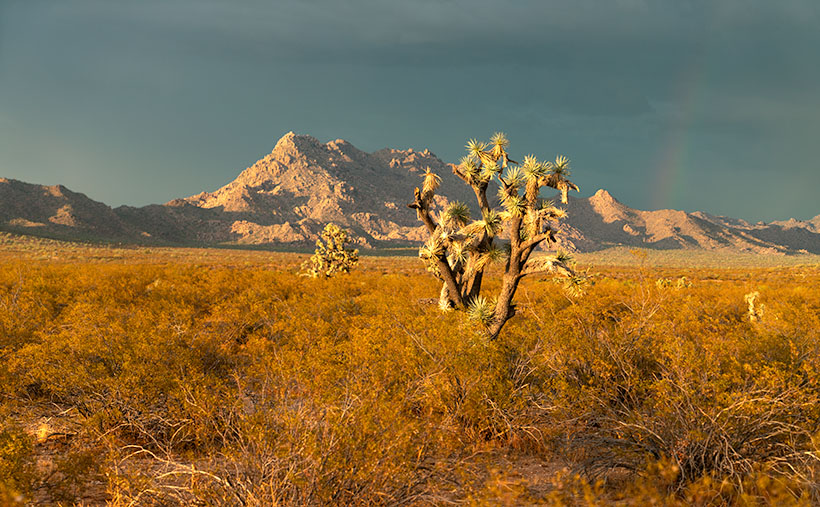
Yes, Virginia, the Sonoran desert gets rainy in the winter. It’s not our wettest time of the year. That honor comes with the summer monsoons. The dueling wet seasons are why our desert is home to the famous saguaro cactus. The winter months provide enough water for these giants for a spring bloom, and the monsoons provide water for the seeds to germinate. I’m unsure how the behemoth cactus scheduled the weather around their needs.
Understanding Arizona’s Two-Faced Winters
Arizona’s winters showcase a dual personality, much to our visitors’ fascination—and sometimes frustration.
The Gulf of Alaska pens the first act of our winter weather. These storms script our late December and January, bringing a chill that bites through the desert air. They’re the colder of our two patterns, and though the California mountains tend to hoard most of the moisture, they occasionally let enough slip through to grace us with a frosty spectacle.
Then, as if on cue, February presents a delightful intermission with weather so perfect it feels like paradise remembered. Daytime highs coyly flirt with the 70s and 80s, while the nights, crisp in the 40s and 50s, are ideal for a lover’s embrace or a solo serenade under the stars. It’s when we remember why we endure the scorching soliloquies of our summers.
But the final act belongs to the Pineapple Express. These storms spun from the warm waters around Hawaii and debuted around March and April. They bring a wetter, warmer embrace, coaxing the delicate plants from their frosty fear. Yet, this is no guarantee of a tender ending—Easter snow has been known to make a dramatic cameo.
Our rains are brief, a fleeting audience to our desert stage. They come and go, cleansing the air of Phoenix’s smoggy shroud and leaving behind a verdant carpet that transforms the desert floor. It’s a weekly show, though some complain it’s too often on weekends. But we Zonies? We wouldn’t have it any other way.
First Glimpse
When one of these Arctic Blasts cuts through the air, it’s as if the mountains around our house don an exquisite coat of powdered sugar. While the sight is breathtaking, the sun’s warm embrace usually coaxes the snow to leave by noon. However, this January presented an extraordinary spectacle that graced the Weaver’s and Date Creek Ranges with a full, snowy embrace from crest to base. This was not just a fleeting visitation but a rare, all-encompassing transformation that demanded to be captured.
On that magical morning, the urgency of the moment overtook me. Coffee, usually the first crucial step of my day, was forgotten. Dressed against the chill, I grabbed my camera gear and drove up the hill, driven by a compulsion to immortalize the scene before the sun could chase the frost away. March’s theme, the Weaver Winter Wonderland, is thus a tribute to this exceptional event. Through my lens, I hope to share the beauty of snow in the desert and a rare moment that reminds us of nature’s capacity for surprise and wonder.
Photographs
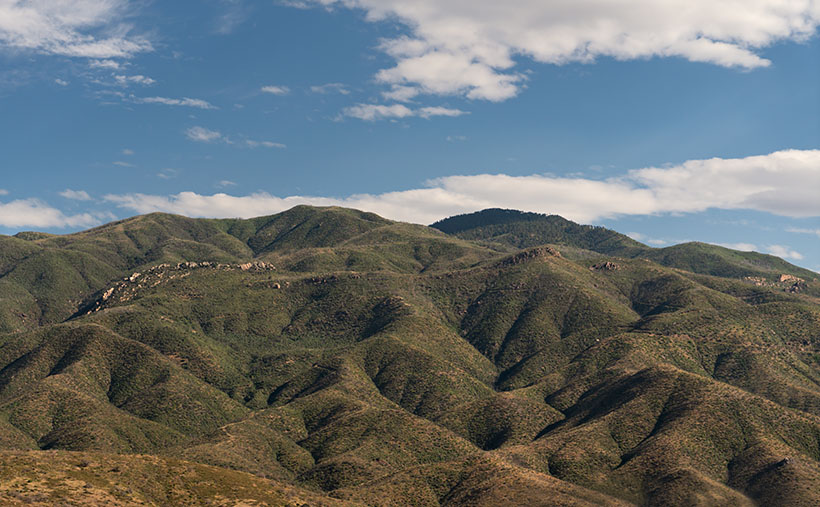
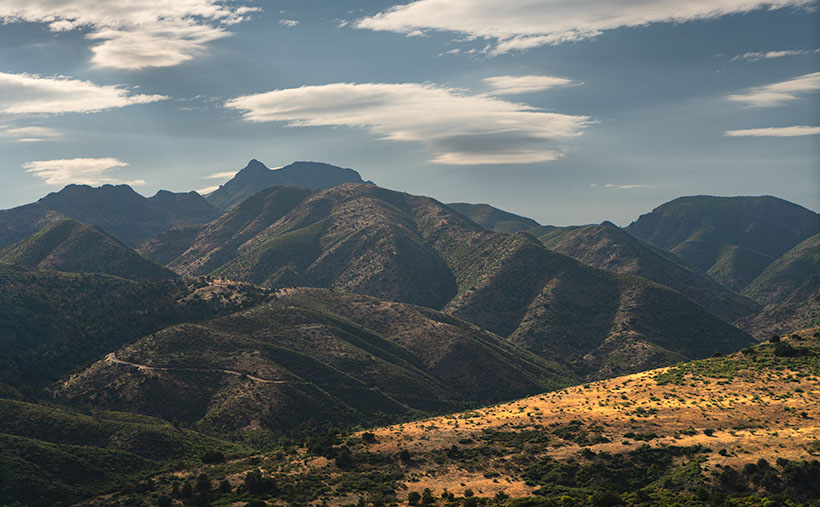
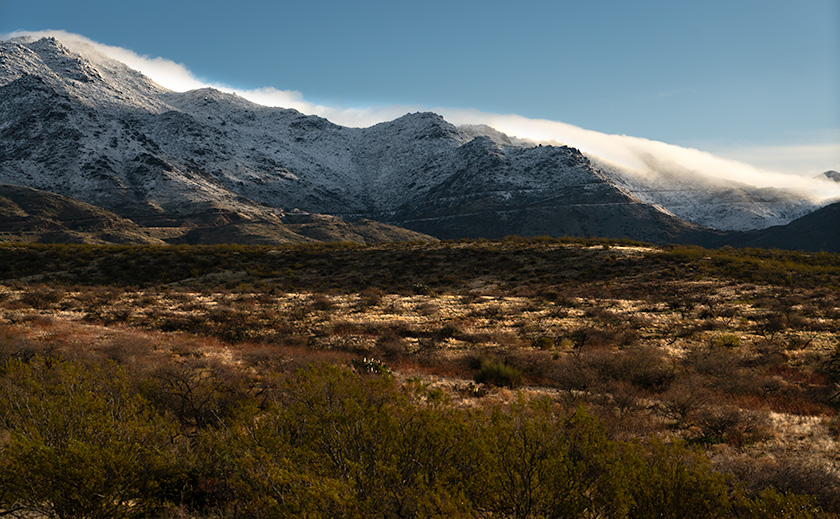
This week’s image is titled Snow-Capped Majesty, and it shows the area where AZ 89 scales the mountainside to the Granite Mountain Hotshots Memorial State Park and Yarnell. I’m happy with the clouds cascading down the slope and the morning light reflecting off the glowing grass. This scene rarely happens, but when it does, I’m glad I moved here to witness it.
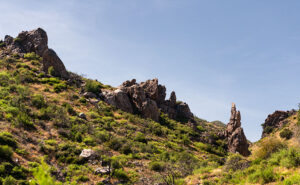
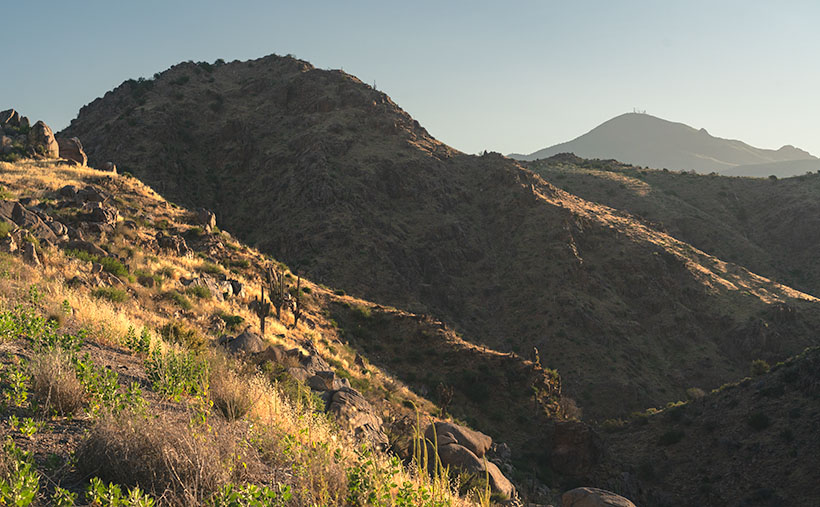
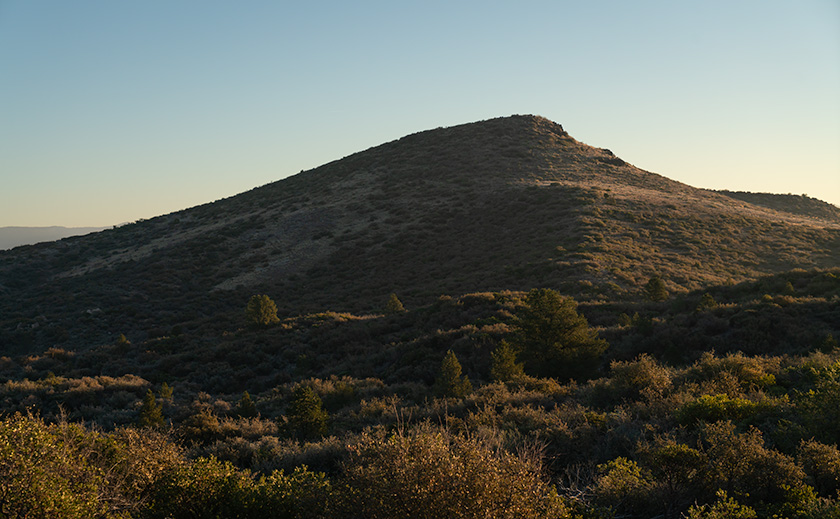
Our second image this week was taken later after all but traces of the snow had disappeared. I named it Chilly Dawn, one of the lower hills among the Weavers having a bit of frost in the air. Those of you with sharp eyes know that this was taken at a high elevation in Peeples Valley because of the appearance of the Juniper trees.
I hope you enjoy viewing my photographs as much as I share them with you. Perhaps we should bookmark and save this series to dig them out in July when it’s 118° outside. Queen Anne and I look forward to your comments about the photos or your winter memories. I have posted larger versions on my website < Jim’s Web> and Fine Art America <FAA Link> should you want to look closer. I’ll have more from Weaver Winter Wonderland next week, so return then.
Until then, keep your socks and humor dry.
jw
March Survey
I need your advice. Since it’s already March, it’s time to consider spring cleaning. To keep my customers happy, I’m asking you to answer some questions about how we’re doing. The survey below will appear for the next four weeks, but I only need your opinion once, so answer the questions once, and you’re done. At the end of the month, I’ll review your input and discuss any decisions we make. I dislike taking these surveys as much as you do, so I’m keeping it short. Mark the first pair of questions with a single answer, but the third is multiple choice. Tick all the boxes that apply to you.
Thanks in advance for helping us.
[formidable id=”4″]