The Town That Never Was Under Yavapai Skies


Robson Mining World Sign
Robson Mining World Sign – The entrance to Robson Mining World is bullet-riddled Yavapai Apache riding a pinto.

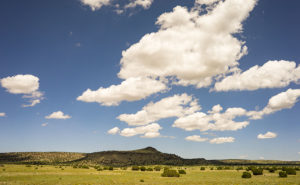
I grew up during the era of the TV cowboy. After dinner, my family would gather in the living room and watch shows like Gunsmoke, The Rifleman, Maverick, and Have Gun—Will Travel to name a few. My dad was a tyrant about the shows we watched and we kids were the remote. Maybe that’s the reason I—and perhaps all my generation—have a fascination with ghost towns. We grew up with Tombstone, Dodge, and Virginia City on our TVs, and vowed to visit them one day. Maybe we’re longing for a simpler time—when the good guy wore a white hat.

The ghost towns best known in Arizona are Jerome, Tombstone, and my favorite, Bisbee. All of these places have residents, so they’re not as much a ghost town as they are tourist traps. A mining town’s fortune is dependent on the mineral wealth removed from the ground. The town’s size correlates perfectly with the amount of ore; be it gold, silver or copper. As soon as the ore plays out, people move on to the next bonanza leaving the hovels and shacks they occupied behind. Without maintenance, those relics soon rot or they’re repurposed for sheds, outhouses, or worst of all, firewood. Most often, when you visit a ghost town, the only things you find are a slab or wall. There’s not much interesting left to photograph. Fortunately, there are exceptions where a state or county government acquired and preserved the scene as a park, such as Bodie and Calico in California.

Yavapai County, where Queen Anne and I live, has its share of Ghost Towns—including Jerome—the most famous. Most of the old sites are high in the Bradshaw Mountains, but mining towns are scattered throughout all the Yavapai mountain ranges; including Congress—our hometown. It wasn’t until we moved here a couple of years ago that I learned about the best ghost town ever, and it’s a mere fifteen miles down the road tucked into the south-eastern flank of the Harcuvar Range.

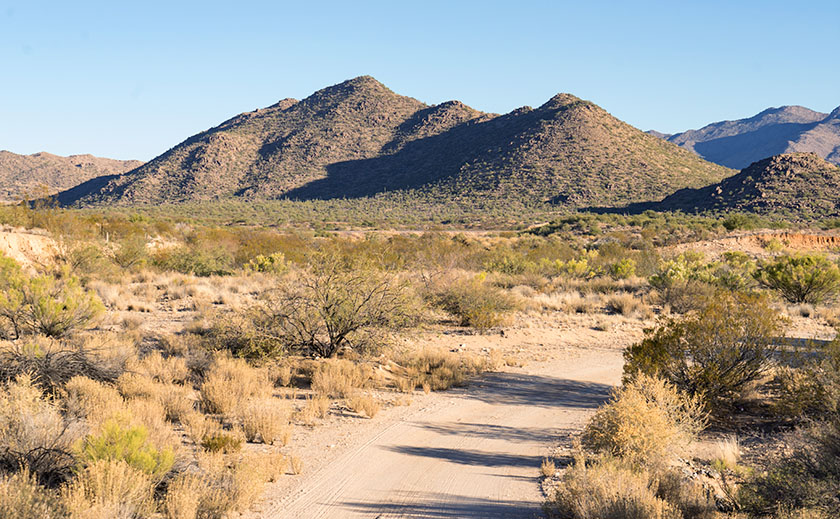
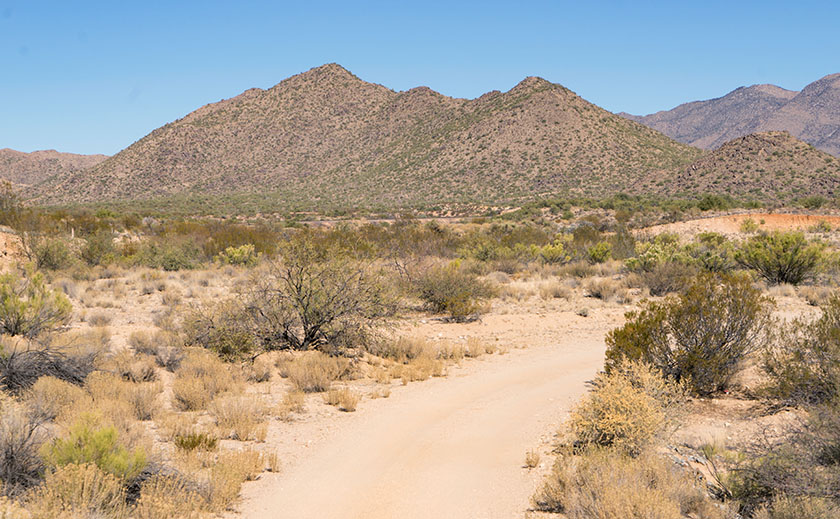
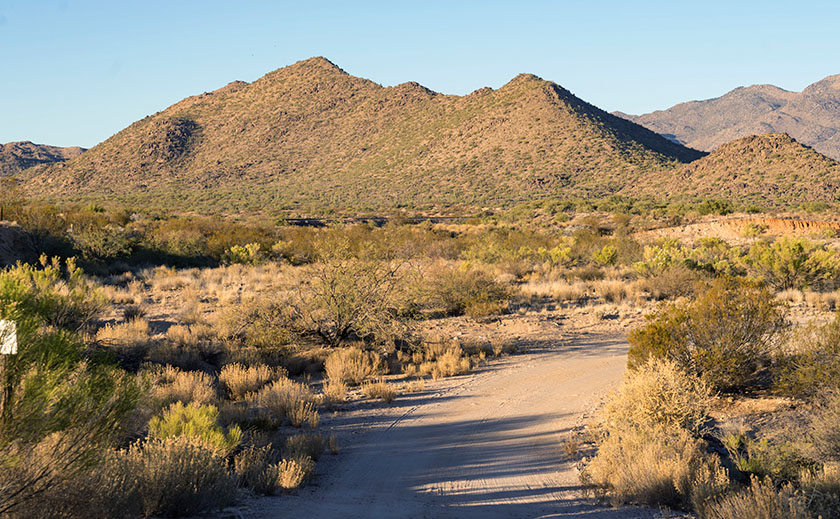
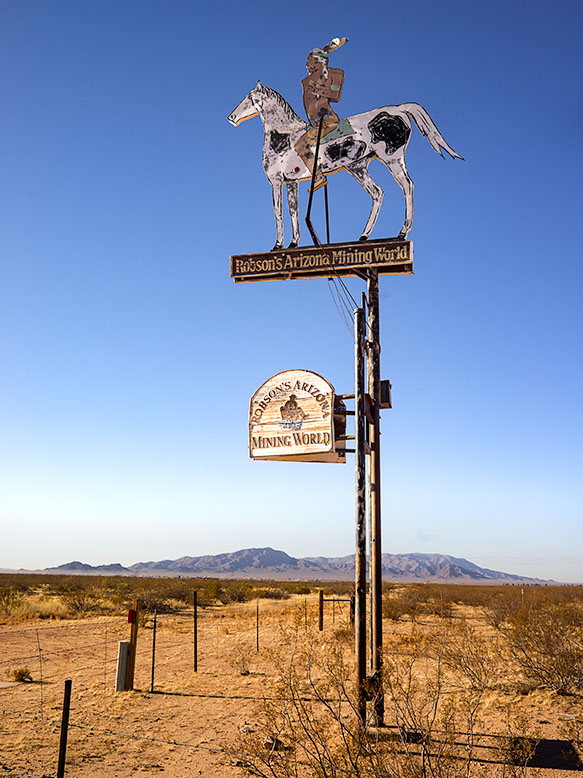
Travel west on Highway US 60 and Aguila is the first small farm community you’ll come to. The name is Spanish for Eagle derived from the eagle-shaped window in the low mountain overlooking the town’s cemetery. The western terminus of Arizona State Route 71 is a mile east of Aguila, and that’s the short-cut you take if you’re heading northeast to Congress or Prescott from California. Just before the road crosses the Maricopa-Yavapai County line is a sign with a bullet-riddled Indian riding a pinto horse. The sign is for Robson’s Mining World—the ghost town you can see at the mountain base. It’s a mining town that no one ever lived in, but has an interesting story nevertheless.

Robson Ranch Booth
Robson Ranch Booth – When you enter the town’s soda parlor, you’d expect to order a milkshake. You’d be disappointed because it’s all for a show.

The gold mine at the end of the trail was first claimed in 1917 by Westley Rush, an Aguila melon farmer. Rush’s two daughters—Nella and Alameda, for whom the Nella-Meda gold mine was named—managed to hand dig through the first 115 feet of solid rock before Ned Creighton—a Phoenix banker—bought the claim in 1924. Ned hired a crew to work the mine, and over decades he expanded the claim to its present size. His crew worked until World War II when the Feds shut down all private mines. The mining engineer, Harold Mason, stayed on as caretaker and eventually got the property deed after Ned passed.

After the war, Charles Robson was building his fortune by farming, running the Saguaro motel in Aguila, and hustling the health benefits of his local bee pollen. Harold and Charley became acquaintances when Mason let Robson place hives at the mine. There were minerals around the mine that made the bee pollen exceptional and the bees deterred poachers. That informal partnership lasted until 1979 when Charlie bought the mine from the aging Mason. Robson had bigger plans for the place.

Cash Register – What this old cash register lacks in functionality, it makes up for with class.

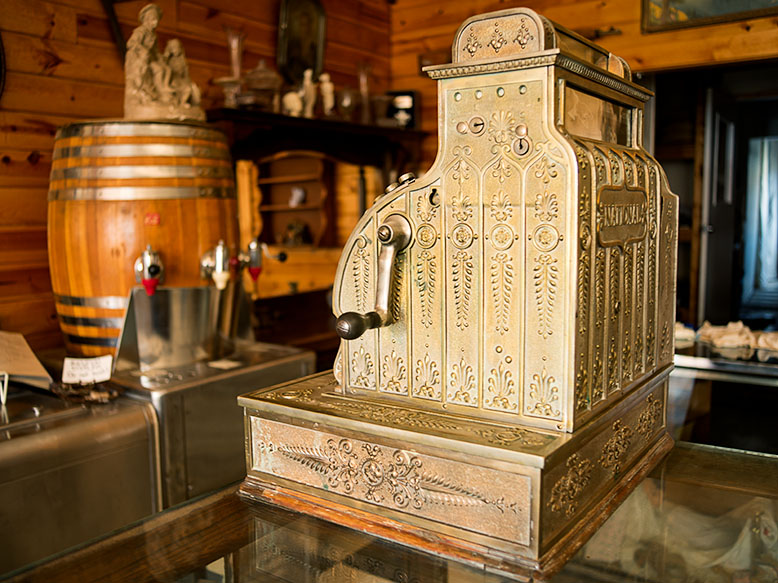
Meanwhile, in 1922, Wilber T. Johnson migrated from Missouri to Apache Junction—a community east of Phoenix at the foot of the Superstition Mountains—so he could work in the mines. In 1930, Wilber traded his pick and shovel for an engineering degree from the University of Arizona which made him a highly valued employee. Now we’d call Wilber a hoarder because he collected mine junk—lots of mine junk—for the next fifty years. Johnson got his stash from abandoned mines in the Superstition Mountains, the Mazatzal Mountains, and other mines east of Phoenix and because of its size, his collection wasn’t a big secret. He reputedly turned down a multi-million-dollar offer from Disneyland Tokyo because he knew that they cherry pick the best and discard the rest.

Mack Truck
Mack Truck – A classic truck that miners used to haul stuff.

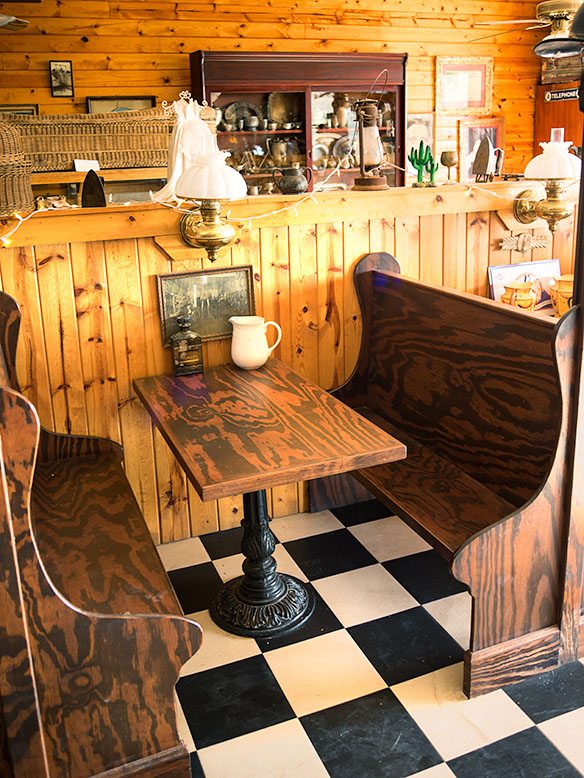
After Charles Robson acquired the mine, he offered to buy Wilber’s collection and the two men finally struck a deal when Charlie promised that the collection would stay intact on Robson’s property. The ink on the signatures hadn’t dried yet before more than 250 truckloads moved decades of mining history to its new home. For ten years Charles, his wife, Jeri, and their sons reassembled the buildings and filled them with the collection’s artifacts. After Charlie died in 2002, Jeri carried on the dream, and toward the end of her life sold the place lock, stock, and barrel to Western Destinations Corporation—the present owners—on the stipulation that nothing ever leaves the property.

Water Truck
Water Truck – A GMC truck that was used to haul water up from the well to the mine.

There’s a small garden in front of the Opera House where we sat in a mesquite tree’s shade as Brett Bishop told me this story. He’s the current caretaker and he and his family live on site. He’s a young man, and when he’s not greeting visitors he keeps busy unpacking the remaining crates and creatively arranging the contents for display. It’s easy to tell—from the tone of his voice and the sparkle in his eyes—that he loves his job. He calls Robson’s a living museum and he often must unravel the mystery of the items he finds in the boxes.

If you’re a photographer interested in nostalgia, I highly recommend a visit. The cost is $20.00 per person which goes toward upkeep. Don’t count on food or entertainment and even the restrooms are period authentic—that’s right; crescent moons. The mile-long dirt road is navigable by a sedan, except after heavy rains. I know that Robson’s will become one of my resources.

Until next time — jw

Observations on a Winter’s Morning

After listening to the radio reports of sub-freezing nation-wide temperatures, I donned my blue light-weight jacket and straw hat as protection against the 48º (F) biting chill and left the house for my daily dawn walk around our compound. The sun was lurking behind the Weaver Range and it turned an overhead cloud into a streak of crimson. I couldn’t decide if it was the Arctic Blast or the red sky that stole my breath.

I’m of course telling you this with my tongue firmly planted in my cheek, but it’s an Arizona law commanding us to brag about our winters just like our law that says we have to tell out-of-state relatives that we’re having Thanksgiving by the pool, regardless of having one. I’m just a law-abiding citizen.

On this morning’s walk, however, I did notice a couple of things that concerned me and another that brought joy. Unlike last year’s wet winter which brought snow to the mountains flanking our east, this winter has been warm and dry. The last measurable rain in Phoenix was August 23rd. That’s not good even though our RV Park is packed with northern people. Octogenarians partying in shorts and loud shirts late into the night dancing the Limbo next to a roaring campfire (do they know we don’t do that here?). All fun I guess, but winter rains are important for us. We count on them for spring wildflowers. More importantly, the mountain snowpack’s feed the streams and rivers where we keep the water Phoenix needs.

The first example I have is this brittlebush. It has flowers which is something that happens in early spring—not at the beginning of winter. In spring the daisy-like yellow flowers cover the brittlebush and they carpet the desert floor, then the heat sets in and the plants shrivel into dry sticks—hence the name.

Brittlebush in January
January Brittlebush – Brittlebush normally sends out daisy-like yellow flowers carpeting the desert floor in early spring.

At the south-east corner of the park, down by the water treatment plant is a large ash tree where our resident Cooper’s hawk nests in the spring. Ash trees in Arizona are always late to turn color, but this one is still green. I don’t know if something in the leach field keeps it green, or the unusually warm weather is affecting the leaves from turning. In either case, it’s not the norm.

Winter Ash
Winter Ash – Ash trees (background) are always late to turn color in Arizona, this one may have missed the bus.

When I got to our cactus park, I was glad to see that the warmth has not prevented the columnar cacti—the ones that look like pipes—from sprouting their winter bloom. This only happens during the coldest part of the year and the cup-like flower stay until the nights warm again. Since we haven’t had a freeze this year, I worried that we wouldn’t be able to enjoy the flowers. Strangely, neighbors living near the park report hearing melodic noises during last night’s (super) full moon. They all said that they heard the soft chanting of “Whip-it, whip-it good” drifting across the night air.

Winter Blossoms
Winter Blossoms – Only on the coldest nights of winter do the columnar cactus sprout these cup-like white flowers.

Until next time — jw

Bring On the Next One Looking To The New Year

The winter solstice and the seasonal holidays are behind us. Instead of taking the tree down and packing the fake pine boughs away in the closet, we’re making strategery for next year. Judging from January’s schedule, 2018 will be a busy year.

One of my 2017 goals was to take part in four Art Shows. I thought that would be a big enough number to keep us busy throughout the year. We actually doubled the goal and finished the year doing eight shows. In 2018, I set the bar higher and set the goal at eight hoping to match last year’s success. With the New Year less than a week away, I’ve been framing prints for three January shows in Wickenburg.

Piedmont Crossing
Alone and in the middle of nowhere, I found this crossing guard with enough moonlight on it to make a picture.
Cinderhills and Clouds
On the high plains of Western New Mexico, puffy clouds cast a shadow on one of the cinder hills.

The biggest of the three is Wickenburg Art Club’s annual Double Takes exhibit. For several years now, the Art Club’s photographers submit photographs that the club’s sculptors, painters, and weavers use as creative inspiration. In January, the photograph and interpretation are displayed as pairs. This year, the newly formed Writers Group gets to gets to be part of the action. Artists have selected four of my photographs and I’m excited to see the results. The show’s grand opening is the evening of Saturday, January 6th from 1:00 to 4:00 pm. If you can join us, Queen Anne and I would love to see you. The show will run in the Clubhouse Main Gallery at 188 South Tegner Street through February 6th. I hope you can stop by and enjoy the show.

Yellow Field
Just east of the New Mexico-Arizona border was a field of yellow flowers with Escudilla Mountain in the background.
Sunset Thunderhead
As the sun began to drop below the horizon, this beautiful thunderhead moved southward over the Weaver Range.

Then, starting on Thursday, January 11th, the Photography Group is hosting a series of eight basic photography classes. These sessions are open to club members and the public and they’re free. The informal classes will be held each Thursday at 1:00 pm in the Clubhouse meeting room and should last a couple of hours each. A different club member will lead each session and the classes cover a wide gamut of photo subjects including two meetings where you can bring in your camera or photographs and ask questions.  The classes are intended is to take some of the mystery out of photography and help you understand your camera and the creative process. I hope to see some of you there.

Until next time — jw

On Seeing A Photograph — Part 3 Go Into The Light

One good thing about photography as an art is that you don’t have to lug around a truck-load of equipment. You don’t need easels, dozens of brushes, tubes of paint, and canvases. All you need is to show up with a camera and some light. That’s an important enough concept for me to repeat myself. There are four variables in photography: the photographer, the subject, the camera, and the light.

If photography is that simple, then why are some people so much better at it? As I’ve previously said, most people assume it’s the camera, which I’ve already discounted. “It must be the subjects then,” you’d suggest. My answer to that would be that you could open Google and search for photos of Delicate Arch (Arches National Park Utah). There are hundreds of photos of the iconic arch, but some stand out from the crowd. Of the two remaining variables, I think that learning to understand lighting is the more important. “But, light is light,” you protest. “Au contraire, mon ami,” I answer. You say that because you haven’t bothered to notice.

When I took classes at Art Center College of Design, the school felt that lighting is so important to photography that the first two exercises we had to complete involved lighting. In the first, we had to make shapes—a ball, a cone, and a cylinder—out of white paper. Then we photographed those shapes before a white background of the same paper. The point of the exercise was to teach us how to separate the foreground from the backdrop using light. The other assignment was to recreate the studio lighting from a ‘40s movie studio still-shot. Instructors assigned us a photograph that we were to analyze, then set up the lights and shoot our model using a single-, two-, or three-light set-up. “Well, that’s all good in the studio, but you don’t get to do that out in the wilderness,” you say. And I’d repeat my French answer. If you want to improve your photography, you need to understand how light works. True, the sun isn’t on a light stand that you can just move around, but you can learn when the light will be better so you can tell your story—even if it means having to wait for it.

Studio Spotlight
A spotlight throws an intense narrow beam of light.
Lights With Diffusers
A diffuse light source casts a broader beam and softens harsh shadows. They’re most effective when placed close to a subject because as you move them away, they begin to act as a point source.

There are two types of light sources; a point source and diffuse source. In a studio, a point source is a spotlight. It throws off a narrow beam of light creating dramatic highlights and shadows (high contrast) and it’s often called a key light. Sometimes the dark shadows are softened with asecond—less intense—light called a fill light. Outdoors, the spotlight’s equivalent is the sun, moon, or a single street lamp. On the other hand, a diffuse light is broad and even; like a fluorescent light, a window without direct sunlight, or even a spotlight with a semi-opaque cover (a diffuser). The light is softer and the shadows are not as harsh. In landscape photography, you get diffuse light on a cloudy day, in a building’s shady side, or at dusk and dawn.

With any light source, its angle to the subject makes a difference too. If the light is directly behind the camera, it will flatten details, while a sidelight emphasizes textures. A light behind a subject—called a backlight—will emphasize feathery edges—like hair or grasses—giving a halo effect. Finally, an overhead light is just another side light from a different direction. Each of the lighting directions—and combinations of them—will show off different qualities of your subject. As a photographer, it’s up to you to choose the light angle that tells your story best.

Morning Light.
This is a simple snapshot of some Congress Hills. The camera, scene, processing are the same. The difference is the time of day they were shot.
Light at High Noon
In this version, the sun was directly behind the camera. Notice the lack of texture in the drive and mountains.
Late Afternoon
In this version, the sun was lower in the west. I feel that the hills show better in the morning shot, but this version best shows the texture in the road. The other noticeable difference here is the warmth of the sun’s light.

Finally, the third aspect of light that is important is color. Part of a stage director’s arsenal is changing the color of lights to set the tone or mood in a play. People who aren’t aware of small color variations, see light as always being the same because our brains compensate for it. I remember the “Stone Age” of photography, blue flashbulbs, and questions like, “Why are my party pictures so yellow?” It’s because the color of light is different between a tungsten light bulb and the sun and those color differences are measurable in degrees of heat, not in Fahrenheit or Celsius, but Kelvin—a much broader scale of temperature used by astronomers. The light bulb burns at only 3000° K, while the sun burns at 5778° K. Another tidbit about the sun is that it’s not yellow—it’s white. It’s always been white for as long as man’s been on earth. Although doing so wouldn’t be very smart, if you looked directly at the noon sun, you’d see white. Only when the sun’s rays travel through extra miles of atmosphere do they seem redder. With digital cameras, this is the topic of White Balance, a discussion I’ll save for later when we talk about cameras. For now, let’s just say that warmer colors seem romantic (sunsets and candlelight) while the bright white or bluish appear cold (icebergs and igloos).

Light attributes that we’ve discussed here combine to create something ethereal called light value. The light’s intensity, its angle, and its color are the things that successful photographers understand and use to improve their images. They show off their subject in the best light (sorry, I couldn’t resist). So, what is photography’s best light? All of them I’m afraid. It’s like asking what color or brush makes the best painting. All the light values are in your toolbox for you to use, and you must search which best suits the story you’re telling. Don’t get stuck using only one, experiment and learn what works best for you and for the style you’re developing.

Until next time … jw

On seeing a photograph — Part 2 What Did You Just Say?

It was nearly a century ago that Fred R. Barnard coined the phrase, “People say a picture is worth a thousand words.” I wonder if that statement is always true. Sometimes I look at photographs and they speak volumes, while others are silent. You may look at the same body of work and feel differently. That’s because we have different backgrounds, values, and tastes. We’re all unique. My point is that photographs, paintings, and art, in general, are a type of communication. They connect the artist with the viewer—sometimes across eons. We save art important to us on our refrigerators and in our museums because we like what they say.

A Story Not Well Told
This is a photograph that would have thrown away but for the file name. It was taken at Yellowstone NP several years ago as we watched a pack of wolves try to separate a calf from the buffalo herd. Their efforts failed when the herd turned and stampeded into the Yellowstone River. I was in the right place at the right time with the wrong equipment. I only save this file because the moment was so great, but I’ve never published the image until now … as a bad example.

There are no language-like rules to help us understand this type of communication; it’s up to personal interpretation. Some messages are simple while others are cryptic. They may sooth or repulse the viewer. With most photographs—or snapshots at least—the story is simple, “At some time, I was here and this is what I saw.” There are millions of photographs just like that posted online and they have little interest to anyone but the person who pushed the camera’s button. When I was in a Pasadena City College class—more than a half-century ago—my professor called them Record Shots. They were a simple record of time and, on the spectrum of art, they belonged in the big pile on the left. On the opposite end of that imaginary line is a short stack of Masterpieces, and everything else fits in between. What separates the two extremes is how good the story is and how well it’s told.

Another NP Wildlife Tale
In Denali, a tour bus trapped us inside while we watched this grizzly sow trailed by three cubs. In the series of shots that I took, I didn’t get one that included all the family members. I finally gave up and concentrated on mom as she climbed out of a swale. I don’t consider it a prize shot, but definitely better than the one above. At least I’m progressing.

An artist’s job is to see a good subject and be able to skillfully capture it on a medium, photographers included. There are skills to help you along, but none are more important than thinking about what you’re shooting. I can plead guilty to mindless shooting, and I don’t know any photographer that isn’t also guilty. Unlike paintings, we create photographs in less than a second. We can squeeze the button and then walk away, never giving it a second thought. But when we look at the contact sheet or RAW image on the screen, we often ask, “What was I thinking?” The answer is, “I wasn’t.”

The idea that I’ve been leading up to is this: To move your work closer to the right-hand stack, begin to think about what you’re shooting. There is something in front of you that has caught your eye and it’s moved you enough to raise your camera and snap the shutter. Fine, go ahead. Maybe you’ll beat the Powerball odds and have one of those remarkable snaps that make the evening news. Odds are against you. But if you stop and think about your subject, you will improve your chances of capturing that lucky shot. What stopped you? Why did it make you stop? Think: “Is there something I can do to make the shot better?” Very few people shoot film any longer and certainly, you can afford to waste a few million electrons on extra frames. Here are some questions I have on my mental checklist:

  • Can I fill the frame—can I move in closer or zoom in to make the subject more prominent?
  • Can I get the subject to stand out better—if I walk to a different angle, does the subject become more prominent?
  • Could the light be better—do I have time for the light to change or should I come back when the light is better? This is difficult in travel photography because you’re usually on a one-way train.
  • Can I simplify the composition—do I need to change angles or wait for people (birds, cows, glaciers, etc.) to move, or maybe I need to pick up some garbage or close the bathroom door to hide someone on the toilet? Remember the discussion about scanning the entire viewfinder and deciding what to include.
  • Is there something that I’m leaving out that would make the shot more coherent?
  • Is the subject about to do something interesting—if I time it right, can I shoot when the subject jumps over a puddle?

To paraphrase a line that we saw on Mr. Robot last night. In the show, they were talking about the game of chess, but it works for photography as well. “If you see a good shot, look for a better one.” You’re probably thinking, “Great! Now I have to hang around for days for that to happen.” If you’re on assignment for National Geographic, you bet you do. That’s what you’re paid to do but unfortunately, neither of us works for them. Most of the time, what I’m saying takes an extra minute or two and, with practice, it eventually becomes second nature. With experience, you even save time because you don’t learn to omit the record shot.

Finally, I have a hard and fast rule: When you’re back at your desk, instead of a bunch of snapshots, you will have a photo series. Some better than the others. When you edit them, be ruthless and pick out the very best then get rid of the rest. If you can’t do that, keep them to yourself. Never show them to anyone. Only show your best. Of course, if you have an editor or art director that will be their job and you won’t have a choice. Then again, if you had an editor, you wouldn’t be reading this.

Until next time – jw

On seeing a photograph – Part 1 If you want to shoot something, just use a gun.

I’m a visual person. I learn quicker from one YouTube video than reading a stack of manuals. I like looking at pictures whether they’re drawings, paintings, or photographs. I look for several aspects of images; the locations, light quality, and creativity. As a photographer, I get inspiration from seeing other people’s work. I try to understand what the artist saw and learn, so I can blend those ideas into my work. As you would guess, a lot of frogs get tossed back in the water before a princess appears.

At times, when people find out that I’m a so-called photography expert, they’ll pull me aside to ask for my advice about cameras or shooting. I’m not a big equipment techie as I think most cameras are more capable than their users are, so when they ask me which body to buy, I just usually steer them to the brand they want. I really believe that newbies get more from learning technique first. Those skills transfer across camera brands. If my coaching is successful, the next thing that usually happens is that they treat me to a pile of their vacation photos (vacation, kids, pets, goats, etc. are all interchangeable here).

As I look through their image stack, I have so many suggestions that it’s hard to know where to start. A common thing I notice is subject placement, or more specifically, consistently centering the subject. It tells me that instead of composing, they’re aiming. I sometimes get in trouble when my stupid mouth automatically blurts, “Well, if you were using a gun, you would have killed (him, her, it).” As an example, I found an image on Flicker’s Public Commons section titled Christy Mahon on the Telephone. In spite of what I just said, I like this image; it works regardless of what I’m talking about, so I’ll use it to illustrate my point. As you can see from my markings, the poor ol’ railway signalman would have “taken-it” in the left nostril. The composition makes me wonder if the photo is a picture of the office or of Christy?

Christy Mahonin the cross hair.
In this photograph from the archives, the photographer has centered the subject’s head. Is this the best subject placement for the story you’re telling?

It’s easy to fall into this trap because cameras often have visual clues that trip you. The focus screen below is an example of what I mean. Although the circle is a focusing aid, it acts like the bull’s eye on a rifle scope urging you to center on your target. It’s a common beginner’s trap that photographers quickly learn to avoid.

Nikon Split Ring Focus Screen
Good or bad, many cameras have subtle cues that can encourage center placement.

So, what’s wrong with centering? Well, err … nothing, and if that’s what you want, then have at it. Centering is actually how we see. We go through life looking at a series of scenes on which our eyes stop for an instant before moving to the next. Our brain processes the information so fast that it seems to flow—like in a movie. We focus using our vision’s center, while our peripheral vision is fuzzy—out of focus. If we detect movement in the corner of our eye, our eyes instantly flick in that direction. For self-preservation, we need to know what was moving. If the movement’s not a threat, then all’s well and we relax. The brain is constantly centering the world around us. If a subject is centered and balanced in an image, we experience calm before we move on … or take a nap.

Now, if we move the subject off-center, our brain tries to restore equilibrium. In this micro-struggle we sense tension and that creates a wee bit of emotion. Remember back to your Psych 101 class when you learned that people remember things more intensely when there’s an emotional attachment. You want your viewers to stop in their tracks when looking at your work and that’s why artists have learned to intentionally use this tension in their work for centuries.

The point that I’m making is that the center of your viewfinder, screen, pad, paper, canvas, or whatever is unimportant. Instead, concentrate on how your subject relates to the edges or frame. Stop aiming and think about composing within that frame. Train yourself to scan the entire area and become aware of what you’re including in your composition. Equally important, is knowing what to leave out. Where are you placing your subject? Where is the horizon (if there is one)?

A question often asked at this point in this discussion is, “Where should my subject be if not centered?” Fortunately, it’s not a secret. Leonardo Da Vinci, Rembrandt, O’Keefe, et Al., used this technique. The ‘feel good’ spot is around the one-third mark, and recent scientific studies seem to confirm its validity (a topic I’ll save for another discussion). An accepted guideline is to divide your canvas into thirds—in a tick-tack-toe pattern. Where those lines intersect, are your composition’s power points and the most effective place for your subject. X marks the spot if you will.

Christy Mahone in vertical composition.
The shot is a vertical crop of the original moving the signal-man off-center. How does this story compare to the original?

Returning to the example photograph of Christy, I have two versions of the image cropped using the so-called Rule of Thirds; one horizontal and the other vertical. Look at the versions and see what you think. Each revision has the same two players; Christy and the depot. For you, how does the story change between the editions?

Christy Mahone in Horizontal Crop
In this version, I’ve cropped the original image horizontally while leaving Christy off-center. Has the story changed? Is it for the better or is it worse?

In this post, we’ve discussed the camera’s viewfinder. Every camera has one and often it’s misused to aim the lens at the subject. I argue that it is a more powerful tool when used to compose your image as intended. A first step in seeing a photograph is intentionally placing your subject for the best impact on the story you’re telling. By choosing where to frame your subject, you’re beginning to see like a photographer. I know, the process seems cumbersome and tedious, but you wouldn’t still be here if you weren’t willing to try. I assure you that with practice, this skill becomes ingrained and you’ll stop thinking about it.

Until next time … jw

Free App Guaranteed to Improve Your Photography

Shortly after moving to Congress, I joined the Wickenburg Art Club (WAC) or more specifically, the Photo Group of WAC. I joined for multiple reasons. Being new to the area, I wanted to meet like-minded people and I felt that being a club member would open doors to show my work. Joining met both of my expectations, but now there’s a price to pay. When you tap into the benefits of any organization, you’re also expected to contribute and, in my case, I’ve been “volunteered” as a committee member whose mission is to organize a half-dozen photography seminar. The goal is to share our experiences with members looking for help. They’re essentially photography classes taught by journeymen.

Sunrise at the Bridge
One of my snapshots of Friday’s sunrise.

I spent a small part of my technology career as an adjunct faculty member teaching community college computer classes; including Adobe’s Photoshop. In a structured education system like that, students start with a history lesson where they’re taught about Atget, Stieglitz, Weston, et al. but we’re going to blow that off. Instead, I think we should start with a fundamental that transcends all cameras. It’s a skill that every photographer struggles with and few (including myself) ever truly master—the skill of seeing. It’s not a binary thing where you either got it or you don’t, but a continuum. We’re all somewhere on that spectrum and some of us sweat to improve.

At art shows, an occasional customer will comment while rifling through my bins, “Wow! You must have a fabulous camera.” Although I assume that they appreciate my work, it could be construed as an insult.  It’s like saying Alton Brown is a great chef because of his pots and pans, or Renoir had magnificent brushes (not that I put myself at that level). The fact is that I do have a couple of good camera systems, but they’re just tools. On their own, they won’t make me a master photographer.

A camera is a key tool in photography, but you can make good pictures without spending a fortune on fancy cameras. For example, look at the fabulous work being done with smartphones. To be a good (on the way to great) photographer, there is an app that’s even more important than a camera. It weighs about three pounds and you need to lug it around all the time. I know it sounds cumbersome, but you already do. The app lives at the back of your eyes between your ears—it’s your brain. OK, maybe that’s the hardware part which is a state-of-the-art processor. My point is that you need to train yourself to see like a photographer. It takes practice, but like they say about Carnegie Hall, “Take the subway.”

For these seminars, I’ve gathered some thoughts on how to start your journey. There are too many for a venue like this blog, it’s more suited for a book, and I’m too lazy to write one of those. In my upcoming posts, I’m going to take each idea in turn and write about it. That way you can take a break in between and think or practice what we’ve discussed—in the grown-up world they call that method distributed learning. After that, I’ll get into camera techniques and explain what the buttons do—and why. Instead of a lecture, I’d like a discussion knowing that some of you are more advanced on these topics, so I ask you to chime in. Ready or not …

Till then … jw