
My calendar page flipped to August this week, and that means that summer’s half over. In standard years, we would have been inundated with monsoon rains and antsy for the wet season to end. But, in this most unusual year, we’re waiting for the rains to start. We often see afternoon clouds here in Congress, Arizona, but they’ve only been a tease. The new month also means a new photo project, and I decided to stay in the high country—if you consider Prescott the highlands. We will wander the trails in the Granite Dells to capture its natural beauty and fill in my Website portfolio. The exposed cracked and worn boulders are common throughout Arizona, but this patch is the only city park.
The Granite Dells of Prescott, Arizona, is a geological wonder with around 1.4 billion years of history. Their formation began deep beneath the Earth’s surface, where molten magma slowly cooled and crystallized into hard, dense granite. Over hundreds of millions of years, erosion wore away the rock layers above, revealing the granite bedrock. Once exposed to the atmosphere, the granite underwent spheroidal weathering, a process that smoothed its corners and edges into the distinctive, boulder-like shapes we see today. This weathering, coupled with millions of years of further erosion, has sculpted the Granite Dells into their current, stunning form, with the boulders providing unique habitats for diverse flora and fauna.
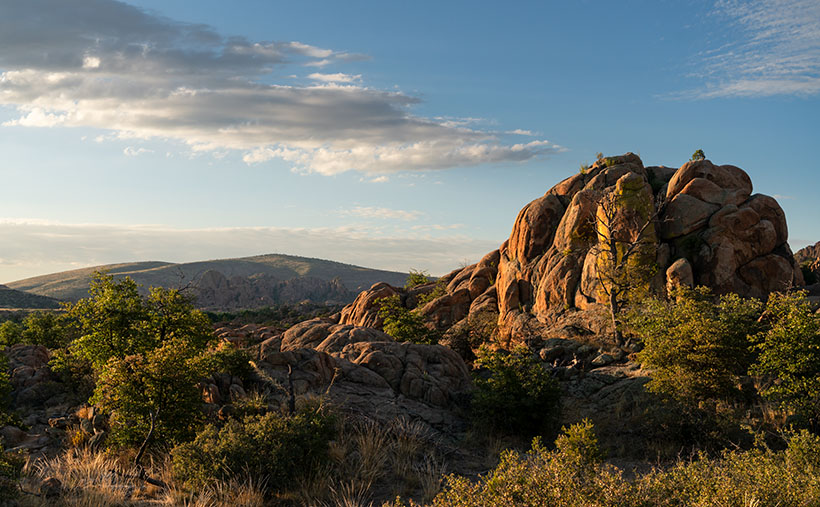
We will start this month’s photo tour of the Dells with a long shot I took at dawn while hiking the Constellation Trail. At that hour of the morning, I thought I’d have the place to myself, but the parking lot was half full when I arrived, and true to form, I was in everybody’s way as I trudged along with my camera. I was in the middle of the loop when the sun emerged above the cloud layer along the horizon, casting a golden light on the rock formation before me. I can’t begin to tell you how delighted I was to see how it showed off the rounded shape and texture of the granite boulders. The Dells have a sense of anchor in their surroundings with the radio-tower-topped Glassford Summit. I call this week’s image Awakening of the Granite Giants.
We’re so glad that you joined us on the trail this morning. Throughout the rest of the month, we’ll share more images taken on tracks running through Prescott’s most significant city park. And you can count on us to dig up more interesting trivia about the Granite Dells. If you’d like to examine larger versions of Awakening of the Granite Giants, you can visit its page on my Website by following this link (Jim’s Website). You can also pixel peep on my Fine Art America posting by following this link (FAA Post). Be sure to return next week when we present another image of the intriguing Granite Dells.
Till next time
jw
Techniques: Restoring Dark Areas In Back Lit Images
In last week’s session, I showed how I manage shots to prevent blowing out the highlights when shooting in lighting conditions too broad for the camera’s sensor to capture—like the dawn, dusk, or back-lit situations. We concluded that discussion by predicting that the darker areas would be too dark to be pleasing. In this post, I will explain how I balance the exposure in Photoshop so the image looks natural.
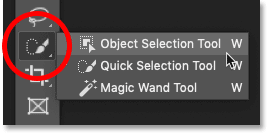
Artificial Intelligence (AI) has recently been in the news, with stories ranging from how it helps doctors find cancer in patients earlier to how it will eventually eat our brains—like Zombies. Well, Adobe has an AI-driven tool in Photoshop that enables you to select complex areas of your images. It’s called the Quick Select Tool. It seems to be mainly used to cut models—and their fly-away hair—from one background so they can be pasted into another. I use it to select the dark areas in my landscapes that need lightening. My process involves three steps: Selecting, Refining, and Correcting.
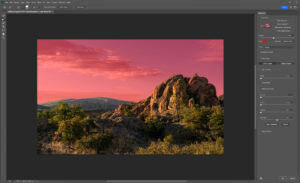
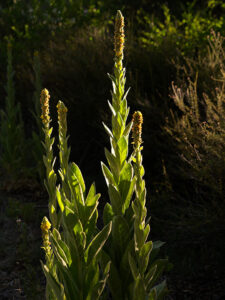
After doing my color corrections and setting my Black and White points in my workflow, I try to balance my image’s exposure. Using the Quick Select (QS) Tool, I roughly select the area I want to work with, and that’s usually everything below the horizon. At this point, I’m not trying to be precise. After I drag the QS brush over the area I want to modify, I click on the Select and Mask button at the top of the workspace, which opens a Masking Workspace showing the selected areas of the image. I use a red mask set to 40% opacity to see which areas of the image will be affected by the following steps. Within the right panel, there’s a bunch of number settings that I’ve fiddled with over the years before settling on these: Radius=0, Smooth=2, Feather=2.5px, Contrast=25%, and Shift Edge=-2% (be sure to check the tiny little box tabled ‘Remember Settings‘ otherwise you’ll constantly have to reset these values). Using these values, I choose the Brush Edge Tool—the second from the top in the brush palate—and run it along the edge of the selected areas. What the AI does for me is pick out all of the little trees and other objects (like the leaves in the second photo this week) and separate them from the sky—an otherwise impossible task. Once I’m happy with the selection, I click ‘OK,’ the screen returns to the original workspace with the selected area now outlined with ‘dancing ants’—a term used to describe the animated dotted line showing the selection.
The next step is to correct for the darkness, and to do that, I choose a new Exposure layer from the list, which opens with the new mask in place. In the new layer, I use the slider to adjust the area to the lightness that looks good to me—usually between ¼ to a complete stop (.25-1.0), but with the sensor on my Sony camera, I’ve been able to lighten the dark areas by 2½ stops without causing a loss of detail in shadows or other unwanted digital artifacts (such as pixelation or banding).
Remember, by working with layers, you can go back and change your adjustments later. Also, remember to save your work frequently, especially after making significant adjustments.